THE ULTIMATE GUIDE TO APERTURE

+ FREE Aperture Video Series

I’m about to unpack one of the most important elements to taking incredible photos.

Aperture is a powerful factor to getting perfect shots of your kids, the gorgeous landscapes on your next vacation, stunning family portraits – you name it.

This is The Ultimate Guide to Aperture for a reason. Together, we’ll uncover how aperture affects everything from exposure to depth of field to lens flare. When you’re finished, you’ll walk away understanding aperture (and your camera!) infinitely better…

And your images will prove it.

Table of Contents

What Is Aperture?

How Does Aperture Affect Exposure?

What’s An F-Stop?

Controlling Depth Of Field With Aperture

What Is Bokeh?

How To Adjust Your Aperture

Different Lenses: What You Need To Know

Does Focal Length Affect Aperture?

Choosing The Right Aperture

Controlling Sun Flare With Aperture

Setting Aperture For Studio Strobes

Recapping The Aperture Series

CHAPTER 1

What Is Aperture?

Aperture, simply put, is the size of the hole inside your lens.

Check out this video for a thorough, hands-on explanation of what aperture is and how it works inside your camera lens. I’ll even have a show and tell moment with my very first camera!

Aperture is the term used to describe the opening and closing of the diaphragm blades on the back of a lens.

According to Merriam-Webster, aperture is defined as:

  • 1 : an opening or open space: hole entered the cave through a narrow aperture
  • 2 a : the opening in a photographic lens that admits the light, b: the diameter of the stop in an optical system that determines the diameter of the bundle of rays traversing the instrument, c : the diameter of the objective lens or mirror of a telescope.

What you need to remember here is:

  • Aperture is the size of the hole in your lens.
  • The size of the hole is adjustable.

To clarify, the aperture is not inside the camera (unless the lens is built into the camera itself).

The aperture is controlled within the lens, regardless of which camera brand or model you have.

I don’t want to confuse you. With most cameras today, you control your aperture with your camera, but it wasn’t always that way, as you saw earlier in the chapter 1 video

Here’s how aperture works

A large hole in your lens lets more light come in, and a small hole in your lens lets less light come in.. Click to Tweet

That’s easy enough, right? Our eyes work the same way.

In a very dark room, our pupils widen to allow more light in so we can begin to discern the objects around us.

On a bright sunny day, our pupils grow smaller to allow less light in, protecting our eyeballs and brain from a flood of too-bright sunshine.

Why do we need different apertures?

Alright, David… I get how the size of the hole affects how much or little light can come in. But why does this matter?

I have three key reasons for you. We briefly touched on the first one already.

3 Reasons Why Aperture Matters

1. Aperture is one of the 3 factors that control how bright or dark an image is.

  • As we learned earlier, the larger the hole, the more light comes in.
  • Inversely, the smaller the hole, the less light comes in.

2. Aperture is one of the 3 factors that control how blurry an image is.

  • I’ll explain this further in Chapter 4. 😉

3. Aperture indirectly determines how long of an exposure you can take, which will either freeze motion or create motion blur.

  • This is related to shutter speed and the exposure triangle, as you'll see in the next chapter.

Bottom line – different apertures can create completely different photos. I am going to be covering this topic extensively throughout the article but I want to show you a quick example of two photos taken seconds apart from each other at vastly different apertures. This will explain reason #2 why it’s important to have the option of changing your aperture.

aperture-example

Which photo do you like better, and why?

In the photo on the left, notice how the subject is in focus and the background is slightly blurred, but you can still make out some details in the blades of grass and leaves on the tree.

In the photo on the right, notice how the subject is still in focus, but the background is significantly more blurred.

Almost everything about the greenery and light is creamy dreamy. I personally love the way our beautiful subject POPS against the extra blurred background in the right photo, but both are great photos!

The main difference between the two photos?

You guessed it…

The size of the aperture!

Now let’s dive into understanding what exposure is and how it works so we can understand what role aperture plays in taking photos. You’re one step closer to creating your own stunning images.

CHAPTER 2

How Does Aperture Affect Exposure

  • If the photo is too dark, the photo is “under” exposed.
  • If the photo is too bright, it is “over” exposed.
  • If the brightness of a photo is just right, we call it a “correct” exposure.
  • Check out this video to learn more (plus my very best Bruce Lee joke).

According to Merriam-Webster, exposure (in photography) is defined as:

  • 2 b : the treating of sensitized material (such as film) to controlled amounts of radiant energy; also : the amount of such energy or length of such treatment (ex: a 3-second exposure).

Dictionary definitions are so thorough and over the top…

But I’ve got your back.

What you actually need to remember here is:

  • Exposure is the brightness of an image.
  • Exposure is subjective.
A correct exposure is when an image looks not too bright and not too dark according to the photographer, not the camera. Click to Tweet

This means we could have very different opinions on the correct exposure of any given photo.

While correct exposure is fairly subjective, there are a few factors to determining exposure, and an explanation on exposure would not be complete without an introduction to the exposure triangle.

Now some people find this triangle to be a tricky little fellow.

I’m here to say that doesn’t need to be your experience.

Anything can be over-complicated, and my goal with you will ALWAYS be to keep it simple.

There are a lot of moving parts here, but I promise to make it easier to learn than ever before.

“Exposing” The Exposure Triangle

Aperture is one of three factors that determine exposure in what we call, The Exposure Triangle.

The Exposure Triangle is made up of 3 elements:

  1. ISO
  2. Aperture
  3. Shutter Speed

Here you can see that aperture, ISO, and shutter speed work together to create a balanced exposure, according to how the photographer intends it to look. They’re like a little family, leaning on each other.

Remember the 2 full glasses of water I used to demonstrate exposure in this chapter's video?

  • One glass was filled from a faucet at full blast, and the other was filled from a trickling faucet.

– When the faucet was turned on at full blast, it took less time to fill the glass to the top.

– When the faucet was trickling water, it took more time to fill the glass to the top.

  • The faucet (size of the hole) acts like the aperture, and the amount of time acts like the shutter speed.

A fun website to practice learning the exposure triangle as well as seeing how shutter speed and aperture affect the image is this site from Canon. (I’m a big Canon guy myself – it’s the brand I shoot natively and love the most!) This simulator from Canon helps people understand manual mode and allows you to play around with each aspect and see how it affects your photos. Pretty cool, right?

Now that we’ve touched on the exposure triangle, let’s dive into how aperture is measured.

CHAPTER 3

What's an F-Stop?

Aperture is measured in an increment called an “f-stop”.

It’s simply a number indicating how big the opening of the lens is.

HERE’S WHERE MOST PEOPLE GET CONFUSED…but stay with me.

The numbers are weird…AND they are the opposite of
what you’d expect.

HIGHER “f” number = smaller hole

LOWER “f” number = larger hole

It’s like a classic case of opposite day…

Quick recap before we continue:

  • The higher the f-stop, the smaller the hole.
  • The lower the f-stop, the larger the hole.

This infographic reveals how the f-stop numbers
correspond to the size of the aperture:

F-stops are usually written with a lowercase followed by the corresponding number (e.g. “f2.8”). In the illustration above, the largest aperture is f1.4, and the smallest aperture is f32. As I said, it’s the complete opposite of what you’d expect.

So you may be wondering, “How do we get the f-stop numbers?”

Well I’m glad you asked, because we’re about to get nerdy.

WARNING: NERDY SECTION AHEAD…SKIP IF YOU DON’T LIKE MATH.

doing-math-about-aperture

F-stops are determined by dividing the focal length of the lens (which is always measured in millimeters), by the opening of the aperture blades (the size of the hole).

For a simple example, a 100mm lens with the size of the aperture opening measuring 25mm in diameter will give us an f4 aperture. (100 divided by 25 equals 4)

Check out the image below for this example broken down visually:

how-aperture-works

So, the reason we have larger apertures with decimal numbers like “2.8” and “1.4” is that these numbers themselves are the sums of fractions.

This is the reason the f-stop numbers get smaller as the aperture hole gets larger.

(AKA a super nerd didn’t just make up these numbers to confuse us all to death…)

A smaller f-stop number means the denominator (or bottom number of the fraction) is a higher number. That bottom number is the size of the hole.

For example, in our 100mm lens equation above, if we were to open up the aperture even wider to 50mm in diameter, we would now have an f-stop number of f2. (100 divided by 50 equals 2)

Again, the bigger the hole…the smaller the f-stop number.

Got it? Good.

Nerdy section complete! ✅

Way to power through with me. Did you learn something new??

Now thankfully you don’t have to know the math to understand any of this.

You just need to recognize one thing:

If you increase your f-stop number on your camera, you will make the hole smaller, resulting in less light coming in.

So how much light are we actually losing between the f-stop numbers? Well, as the infographic below shows us, each jump between these common f-stop numbers results in a 1 stop increment.

fstops-and-light

Hold up – what the heck is a stop?

A “stop” refers to the amount of light coming into the lens.

If we go from f1.4 down to f2, we will lose 1 stop or half the amount of light.

To get a proper exposure, we would need to compensate for this loss of light by either reducing our shutter speed by half, or doubling our ISO. Inversely, if we go from f1.4 to f2, we will gain 1 stop or double the amount of light.

To get a proper exposure in this case, we would need to compensate for this extra light by either doubling our shutter speed, or halfing our ISO.

All of this has to do with the exposure triangle, so feel free to reference Chapter 2 again if you feel lost. Now that we’ve extensively covered f-stops, let’s move on to how these numbers affect another aspect of our photos.

CHAPTER 4

Controlling Depth Of Field With Aperture​

Depth of field is the amount of space or distance that is in focus.

To be clear, depth of field is not WHERE you focus, but HOW MUCH of your photo is in focus.

It’s how much of the foreground and background are in focus around the specific point you are focused on.

Let’s play a lightning fast round of true or false.

True or false? Depth of field is in every photo. Click to Tweet

I revealed the answer (and showed a depth of field lesson preview from Master Your Camera) in the video above.

But if you answered “true” to the question I asked above, you’re RIGHT!

If you said false, don’t worry…

I can’t tell you how many times someone has asked me to “do that depth of field effect.”

Of course I totally understand what they mean, but it always makes me chuckle because every image has depth of field! However…

Your depth of field, the amount of space or distance in focus, can vary. Check out the chart below to see what I mean.

This means you can have a larger depth of field or a shallower depth of field.

  • A “shallow” depth of field means that the background is very blurry and out of focus.
  • A “deep” or “large” depth of field means that (almost) everything in the image is crisp and in focus.
  • The lower the number of the f-stop, the shallower the depth of field will be.
  • The higher the number, the deeper the depth of field will be.

Now that you understand what depth of field is, are you ready to learn how aperture (measured in f-stops) affect depth of field? Let's do it! 

Aperture is one of 3 key factors that control depth of field. Here’s how it works:

  • The lower the number of the f-stop and the larger the hole, the shallower the depth of field will be.
  • The higher the number and the smaller the hole, the deeper the depth of field will be.

Here’s a gif showing the different effects of the depth of field at different apertures:

changing-aperture

3 Key Factors To Controlling Depth of Field

What are the other 2 factors to controlling depth of field, you ask?

Here’s the rundown.

1. Aperture

– We just talked about this one!

2. Zoom

– Zoom in closer to your subject for a shallower depth of field.

– Zoom out further from your subject for a larger or deeper depth of field.

3. Proximity

– Step closer toward your subject for a shallower depth of field.

– Step further away from your subject for a larger or deeper depth of field.

Play around with these 3 factors the next time you are shooting and see how they individually and collectively affect your depth of field!

Quick quiz!

(Don’t worry, I’m not grading you! wink wink)

When we take a photo with a shallow depth of field, do you know what term we use to describe the quality of the blurred parts of the image?

Keep scrolling to find out!

CHAPTER 5

What Is Bokeh?

Bokeh is a term to describe the blurriness or how out of focus the background is.

Fun fact! It is actually a Japanese word meaning “blur.”

How the heck do you pronounce it? Bo-kuh or bo-kay??? The topic is quite controversial. We may never know in our lifetime.

We use the term “bokeh” to describe the aesthetic quality of the out of focus parts of an image.

Wikipedia defines it as, “the way the lens renders the out of focus points of light.”

Bokeh is actually due to a shallow depth of field.

Remember the 3 key factors to controlling depth of field??

  1. Aperture
  2. Zoom
  3. Proximity

While you can control depth of field with the factors above, bokeh is one of those things in photography that is totally subjective to the photographer.

So…
What is good bokeh? What is bad bokeh? More controversy ahead.
A lot of people will argue that if the specular highlights or circles in the blurred background are beautifully rounded, that is “good” bokeh, and if they have straighter edges like an octagon, hexagon, or pentagon, that is “bad” bokeh.

But you could say it's kind of a blurry topic. 

Circles aside, typically a shallower image rendering a smooth and soft out of focus background is considered “good” bokeh.

Here’s an example of my wife with 3 of our kiddos:

bokeh

Notice how creamy the background is? The reason we consider it “good” is because the smooth bokeh allows the viewer to not be distracted by the background, but draws the eyes to focus on the subject of the image.

Super smooth bokeh makes your subject POP. Now that’s what I call bokeh, baby!

We don’t need to go too in depth for this chapter, but now you have an idea of what bokeh is.

To learn more about bokeh, you can get an extensive explanation on bokeh that will make you a bokeh master.

Here are some advertising photos I took to help bring home the idea behind creating a shallow depth of field and how it brings your photos to life.

Notice how the subject(s) in each shot stands out from the rest of the background?

That’s the power of a good bokeh! Let’s move on to some practical steps so you're ready to take some amazing photos.

CHAPTER 6

How To Adjust Your Aperture

We’re getting to the good stuff…

We are onto the HOW!

I'm going to break everything down for you in this video.

I'll even show you how to use a “cheat” mode on your Canon, Nikon, and Sony cameras!

Give yourself a pat on the back for getting this far.

You’re learning SO much, right?!

Let's dive into how to adjust your aperture using 2 different camera modes.

Changing F-stops Using Aperture Priority Mode

Ok…so you’ve got the gist of what aperture is and how it affects the photos you’re taking, but you may not be super ready to shoot in complete manual mode on your camera.

I totally get it. It can seem daunting at first.

But you’re in luck!

You probably have a mode on your DSLR or mirrorless camera that will get you some quick wins…

All you have to do is decide what aperture you want!

Ready to take those super shallow depth of field photos with the gorgeous blurry backgrounds?

With this special mode, all you have to do is set your aperture to a wide open setting (low f-stop) and start clicking!

This “set your aperture and forget the rest” mode is called Aperture Priority Mode.

Aperture Priority Mode is part manual and part automatic. You set the aperture manually and let the camera automatically calculate everything else for you (shutter speed, ISO).

  • On Canon cameras, it is labeled “Av” on the dial.
  • On Nikon and Sony cameras, it is labeled “A”.

This mode prioritizes aperture, meaning that it lets you choose what aperture you want to shoot at and then sets your shutter speed to auto so the camera will figure out the rest.

Set it and forget it – pretty nice, right?

Note: You might still have to change your ISO to auto depending on your camera, so be aware of that if you’re not comfortable with understanding the exposure triangle yet.

The great thing about this mode is that it’s probably the best automatic setting your camera has, so throw on a lens, set your aperture as low as it will go, and have some fun!

Changing F-stops Using Manual Mode

Locating Aperture in Your Viewfinder:

Camera manufacturers all differ in what their viewfinders look like, but the diagram below shows what a common viewfinder looks like. In many cases, the aperture will be located right next to the light meter.

Sometimes aperture will have an “f” by the corresponding number, and sometimes it won’t. Check your camera manual if you are unsure. Now that you know how to adjust your aperture in aperture priority and manual modes, let's move onto the world of lenses.

CHAPTER 7

Different Lenses: What You Need To Know

Have you ever noticed that your pictures suddenly became darker when you tried to zoom in?

You might notice this if you have your kit lens attached.

I'll talk through these limitations, the difference between variable & fixed aperture lenses, and more in this video.

Don’t worry…I’m not going to tell you to get rid of your kit lenses.

Even though they aren’t my favorites, there’s nothing wrong with using them.

You just need to understand their limitations.

What is a kit lens?

A kit lens is the lens that came with your camera.

A common example is the 18-55mm lens that comes with the Canon Rebel bodies or the Nikkor 18-55 for Nikon cameras.

Your kit lens likely can’t go below an f3.5 aperture on the wide end, and then when you zoom in, it changes to f5.6…

What’s up with that??

Well, depending on your camera system, your kit lens probably has a “variable aperture,” meaning that the aperture changes depending on your zoom range.

Simply put, zoom lenses that have a constant aperture require more sophisticated glass and are very expensive to make, so most manufacturers opt for a cheaper solution to include with their camera.

With a variable zoom lens, it makes it a liiiiittle more difficult to get those really shallow depth of field photos.

This is why I recommend getting a prime lens to start out.

No, I’m not talking about Amazon Prime…although you could definitely Amazon Prime one of these lenses. (By the way, when did Amazon Prime become a verb? I digress…)

What is a prime lens?

A prime lens is a lens with a fixed focal length.

This means that the lens does not have the ability to zoom. You have one focal length per lens, and that’s it.

What’s the point of that?

Prime lenses have no moving parts like zoom lenses do, so it’s a lot easier (and cheaper) to manufacture a lens that is capable of a much wider aperture.

Even most high end zoom lenses can’t go below an f2.8 aperture, but an inexpensive 50mm prime lens can go all the way down to f1.8 giving you to ability to shoot some really beautiful shallow depth of field images.

Talk about bokeh, baby!

There are quite a few companies that have have produced some great prime lenses without breaking the bank.

Canon and Nikon both have a 50mm f1.8 lens for somewhere between $125 to $200 depending on where and when you purchase. This is a super good place to start for a low-cost entry into shooting with low apertures. We call these amazingly inexpensive (but great bang for your buck quality) 50mm lenses the “NIFTY FIFTY” because of how amazing they are for shooting in various situations.

Prime lenses are available in a number of different focal lengths, and quite a few photographers choose to shoot exclusively with primes because of the beautiful images they are capable of.

Anytime a photographer asks me what is the first lens I should buy I tell them to buy a “nifty fifty.” And I’m pretty sure the whole photoverse would agree with me.

You’ll love it for shooting family portraits with creamy dreamy backgrounds. Because of its low f1.8 aperture, it’s even a fantastic choice for lower light situations, like a beach sunset.

I shot many of my first professional gigs with the Canon version of this lens, so I highly recommend you ask for it for your next “honey please” gift.

Here are some 50mm photos I've taken to show you wide range of photos you can get with this prime lens.

CHAPTER 8

Does Focal Length Affect Aperture?

As you’re getting started in understanding aperture, you may notice that your depth of field looks a lot different between lenses.

For example, you might be shooting at f4 on an 85mm lens and are getting photos with a really blurry background, but if you shoot that same aperture on a 35mm lens, your background doesn’t seem to be as blurry.

I can explain!

Uhhh, David did I do something wrong?

Nope! This has everything to do with lens compression.

Before we dive into lens compression, I want to make sure you understand focal length.

According to Merriam-Webster, focal length is defined as:

  • : the distance of a focus from the surface of a lens or curved mirror

For example, a 50mm lens has a focal length of 50mm. 50mm is what you and I see with our eyes. It's not zoomed in and not zoomed out. If you had a focal length of 51mm, you would start zooming in a little bit, and if you had a focal length of 49mm you would start zooming out a little. This will affect your depth of field, because if you remember from Chapter 4, zoom is one of the 3 key factors to controlling depth of field.

Zoom

  • Zoom in closer to your subject for a shallower depth of field.
  • Zoom out further from your subject for a larger or deeper depth of field.

I promise this doesn't have to be too complicated.

This is what you need to know about lens compression:

  • Wider lenses have less compression.
  • “Zoomed-in” telephoto lenses have more compression.

So you may be thinking: I’ll just put my aperture as low as it will go and my backgrounds will be blurry!

Well…not quite.

Sorry to burst your bubble. 😬 Don’t worry, I’ll explain myself.

If you have a wider lens (ex: 24mm), you may not be able to get the background as blurry as you can with a longer lens (ex: 200mm).

Lens compression plays a role in not only how blurry the backgrounds are, but ALSO how distorted a picture looks.

To illustrate what I mean by “distortion,” here are some portraits taken at f4 from 24mm to 105mm on a full frame camera, moving farther away from the subject between each shot as I zoom in to keep the composition the same:

And here are those same shots animated to show you how lens compression and focal distortion come into play:

The farther I backed up and zoomed in, the more pleasing the image looked because it was free from distortion.

But here’s the point I want to make:

Notice that the shots at 24mm and 35mm seem to have a deeper depth of field, while the 105mm shot seems to have a shallow depth of field…all at the same aperture.

Actually – the bokeh (or blurriness) of the background isn’t technically changing much from shot to shot.

What’s REALLY changing is the lens compression.

In fact, here are two images side by side with the 50mm shot zoomed in so you can compare the background with the 105mm shot:

A telephoto lens gives the perception of a blurrier background because of lens compression.

When lens compression is doing its thang, the background becomes more zoomed in, causing what is blurry in the background to appear BIGGER and blurrier.

Here is an example from Master Your Camera where I go through 9 different focal lengths without moving the tripod. I set my aperture at f/4.0 and shutter at 1/60th of a second.

Quick Tips

  • You can use a very low aperture on a wider lens to get a blurry background, but it is much easier to get a blurrier background when you use a longer lens.
  • If you want to have blurry backgrounds in your photos, move farther back (or place your subject further away) and zoom in.
  • You can either use a long prime lens (I recommend 50mm or higher), OR you can zoom in using a zoom lens (I recommend a 70-200 range).

CHAPTER 9

Choosing The Right Aperture

Alright, David…I’m feeling empowered and ready to put all of this aperture talk to good use.

Where do I start?

I'm going to cover a few possible scenarios and some recommended apertures to get started in this video.

I totally get it.

Sometimes you just need some quick tips to get started.

I'm going to explain my top recommended apertures for single portraits, group shots, and landscapes or long exposure shots below. Consider it like an on-the-go aperture quick start guide!

Note: Keep in mind the focal length of your lens will affect the depth of field, but these are generally good places to start.

Single Portrait – Go for a swim in the “shallow” end!

Get super shallow! Throw on that prime lens and put the aperture as low as it will go. Practice making your beautiful subject POP with an extra shallow depth of field.

Have fun and post your photos in the comments below!

Recommended apertures: f1.4 – f2.8

Group Shot – 🎶 We are family… 🎶

We’ve all been there – group shots can be tricky to master. I’ve got some quick tips for you! If you’re shooting more than 2 or 3 people, you may need to shoot at a little higher aperture to make sure everyone is in focus. Shooting too shallow might put the person in front in focus, but the person standing in the back out of focus, so be aware of that.

If you are shooting more than one row of people (say, for family portraits or team photos), you might want to consider starting at f8 or f11 to get most of your subjects in focus.

I wanna see your shots in the comments below!

Recommended apertures: f4 – f11

Landscape/Long Exposure – Adventure awaits!

If you’re shooting landscapes or want to create a long exposure of a river or something of that “nature” (😜), you’ll most likely want to stop the lens down to a very small aperture.

Remember the opposite day rule: the smaller the aperture, the higher the f-stop! Opening up the shutter for a longer time will allow more light in, so you’ll have to compensate by stopping down your aperture to a smaller size hole. Plus, this will make sure everything is sharp and in focus.

Leave your money shots in the comments below!

Recommended apertures: f16 – f22

 I really want you to practice these because 1) I selfishly want to see your work! and 2) shooting regularly and doing photo challenges WILL make you a better photographer!

Better start snapping. 📸😉

CHAPTER 10

Controlling Sun Flare With Aperture

Different apertures not only affect the depth of field in your images, but ALSO have different effects on bright lights coming into your lens.

In this video, I'm going to talk about how aperture and lens flare are directly connected.

Take a look at this photo that was taken with a long shutter speed…and check out the street lights:

Notice how they all look like starbursts?

This effect was achieved because the photo was taken with an f16 aperture and the lights are shining through the aperture blades in the lens.

You can also get this effect with the sun when you shoot at higher apertures:

Welcome to the magical world of lens flare!

Lens flare is the result of a bright light source entering your lens and refracting the light in a unique way.

This scattering of light causes a seemingly endless variety of lighting effects:

  • Starbursts
  • Orbs
  • Rainbows
  • Bright blobs
  • Haze

It’s way easier to create than most people think…

And can all be accomplished in-camera. No fancy photoshop skills required!

All you need to remember are these 3 easy steps:

1. Place your subject between you and your light source.

2. Adjust your aperture according to the look you want.

– For starbursts, you want a higher f-stop.

– For glowy blobs of light, you want a lower f-stop.

3. Adjust your shutter speed as necessary to keep a balanced exposure.

CHAPTER 11

Setting Aperture For Studio Strobes

This section is definitely reserved for the more advanced users of the bunch, but if you’ve ever used a flash or shot with strobes in the studio, you’ve probably made an interesting discovery regarding your exposure.

I'll talk about that interesting discovery and help make everything crystal clear in this next video.

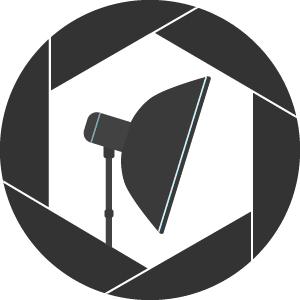
When shooting studio strobes I typically set my ISO low around 100-400 and then leave it on one specific setting.

AKA set it and forget it.

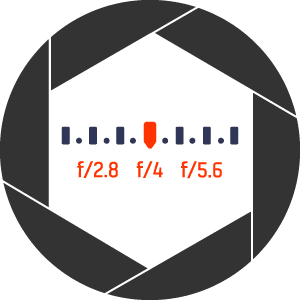
After you set the ISO starting point on your camera or off camera light meter, we typically refer to the power of a strobe by “f-stops”, leaving shutter speed out of the conversation entirely.

Why?

I’m glad you asked.

As we just learned in the video above, shutter speed doesn't affect your exposure when using strobes, only aperture and ISO do. And remember, for ISO I set it and forget it.

Storytime! The first time I ever shot with a flash, my image came out too bright…

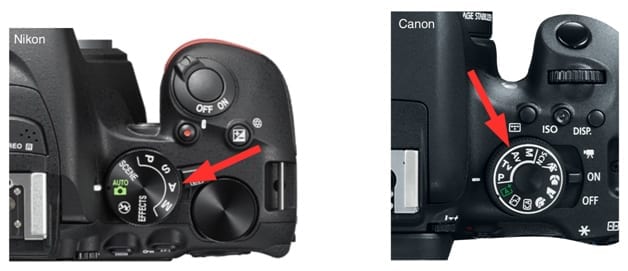
So I did what any sensical photographer would do and adjusted my shutter speed a little bit in manual mode. In almost any other situation this would have corrected the exposure…

But to my complete surprise and frustration, the photo looked exactly the same! Even though I adjusted my shutter speed, the photo was still too bright and over exposed on my subject’s face!

What’s up with that?

After lots of trial and error, conversations with friends, and soul searching (JK 😂),  I realized that shutter speed ONLY affects available or natural light but not the light from the strobe.

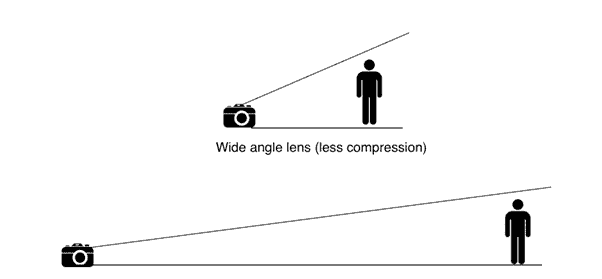
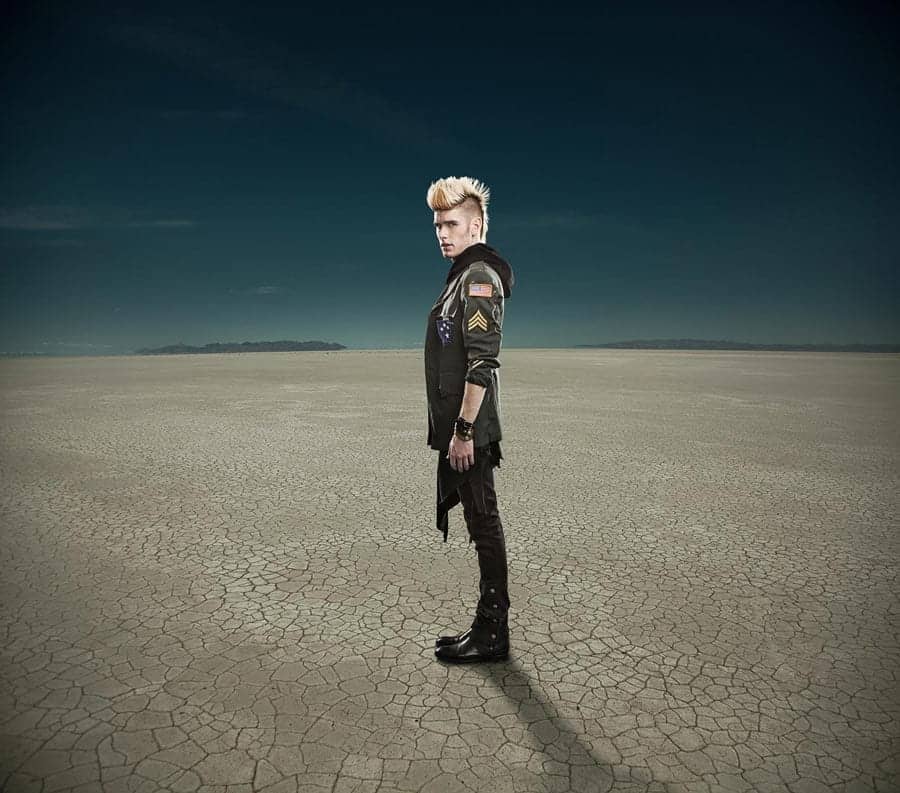
This means the shutter speed is only going to help adjust the brightness of the background (like the mountains) that the light from strobe is not hitting. As an example,  regardless of how powerful it is, your flash will not light up the mountains in the distance.

When you’re shooting with a flash on your subject, you’re dealing with a burst of light at an equivalent of about 1/4000th of a second, so your shutter speed has little to no effect on the flash – unless you up your shutter speed too high, and then you’ll introduce black bars in your image because of “shutter sync” issues.

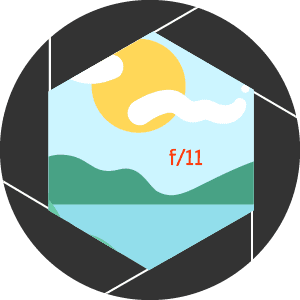
The power of a strobe is measured mostly by your f-stop. When using a strobe you can pretty much only the control the exposure by setting your aperture.

Bottom line: aperture is what directly affects your exposure when using a flash, so keep that in mind!

It is also how you control the depth of field in light painting photography.

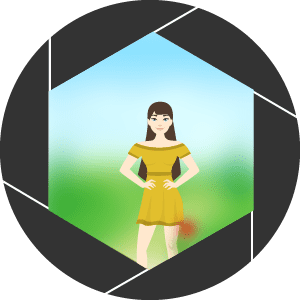
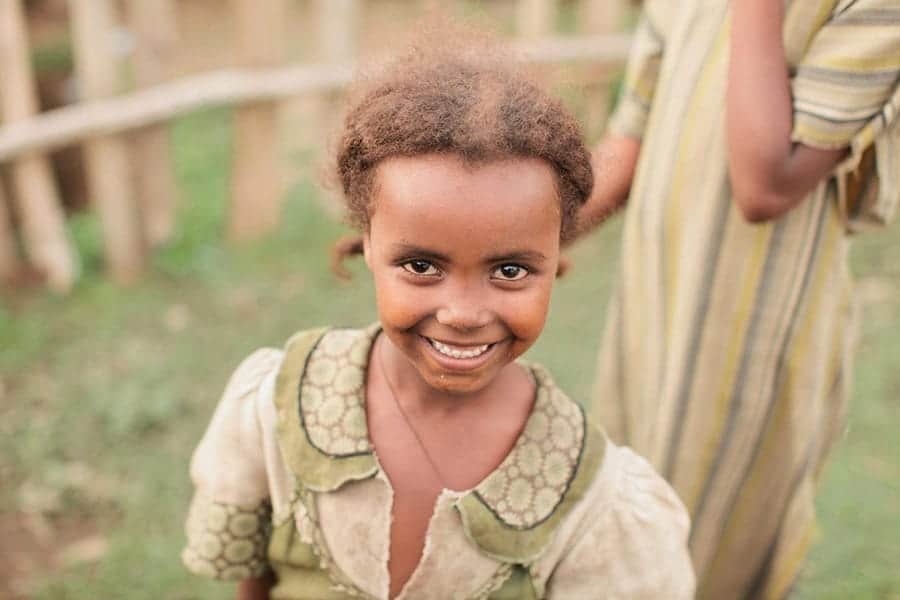
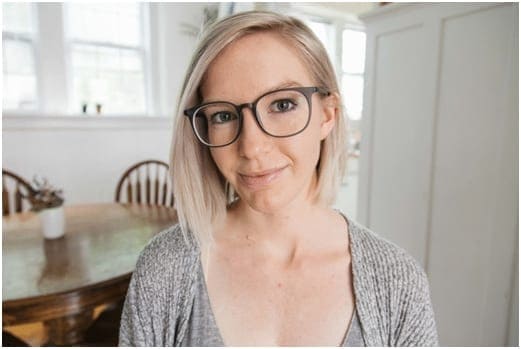
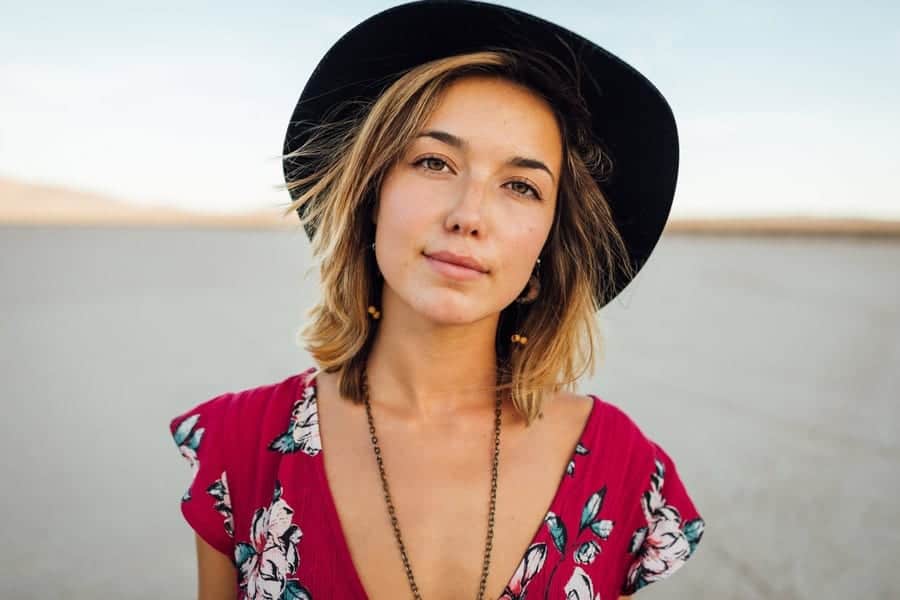
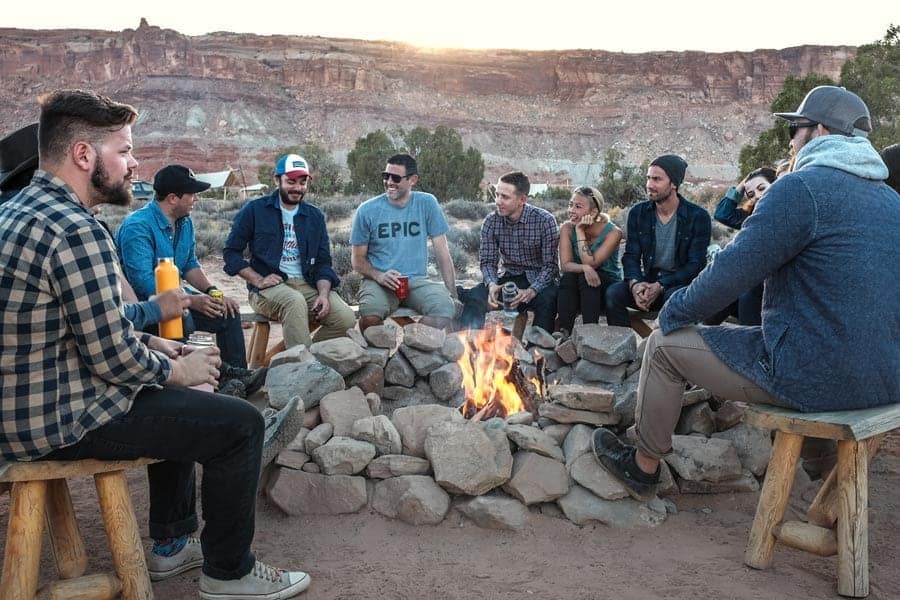
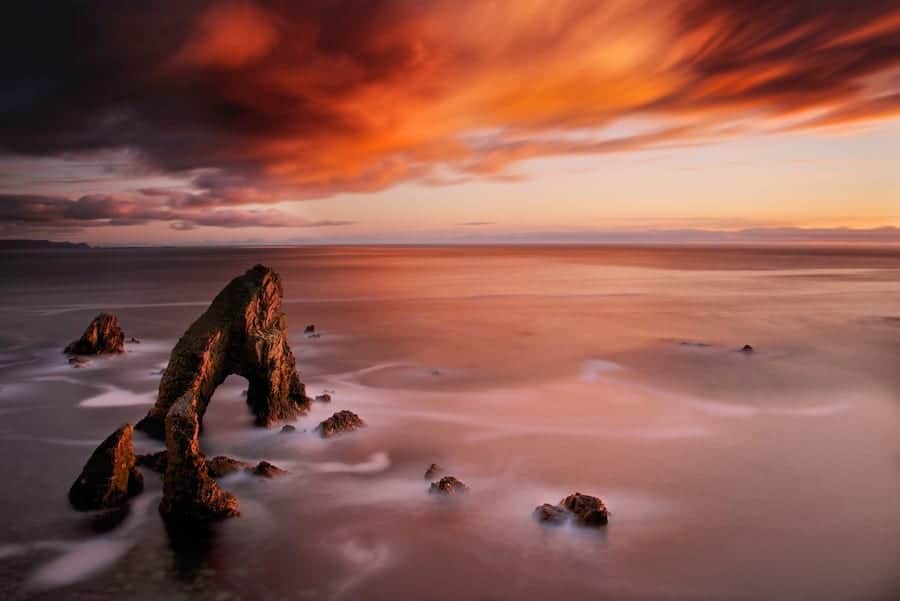
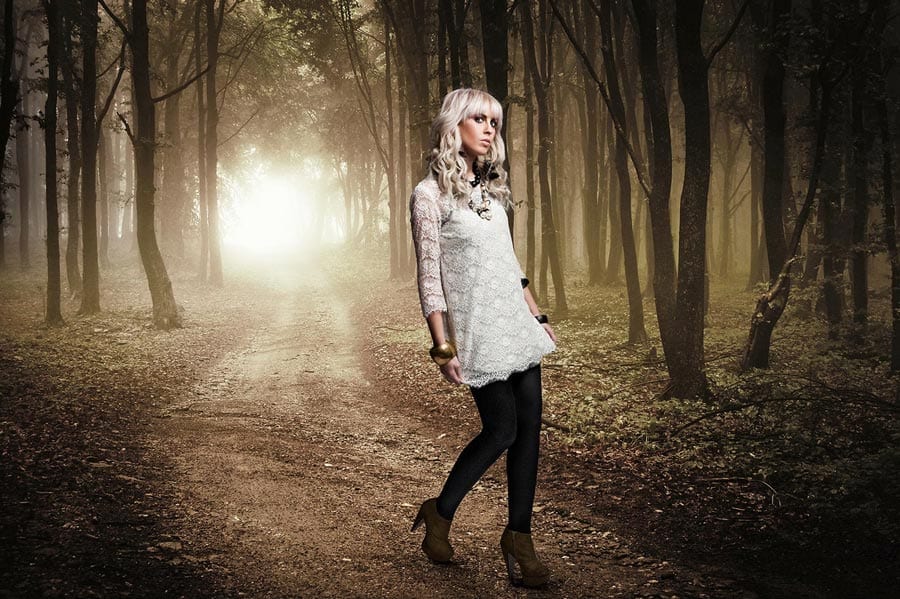
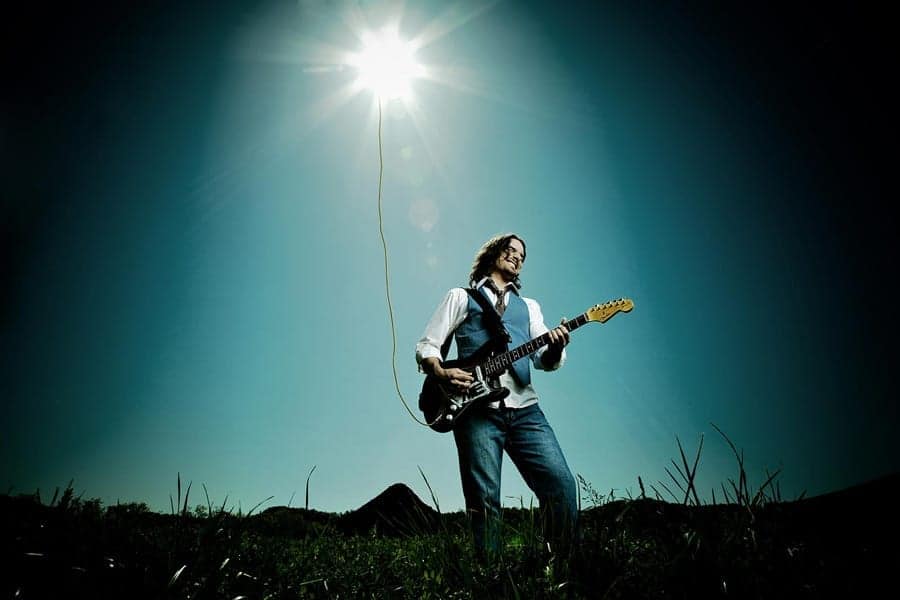
Here are some photos I took using strobes while adjusting the aperture to get the correct look I had in my mind.

CONCLUSION

Recapping The Aperture Series

Wow. You made it!

You’re well on your way to taking better photos!

I’m proud of your dedication to learn and desire to improve your photography game.

It’s time to tie everything together with a thorough recap!

We covered a “hole” lot of ground today.

They say you need to hear/read something several times before you truly learn it, so…

To wrap up this deep dive on aperture, let’s summarize the main points of what we’ve learned:

  • The BIGGER the hole, the more light that can come in. The smaller the hole, the less light that can come in.
  • We learned that aperture affects exposure, or the brightness of an image, and is one of the three main components of the Exposure Triangle.
  • Then we talked about F-stops and how they measure the size of the hole. (Remember, the numbers are the exact opposite of what you would think). The smaller the number, the BIGGER the hole. The larger the number, the smaller the hole.
  • Then we moved on to depth of field, and how it’s defined as how much of the image is in focus. A BIGGER hole, the shallower the depth of field. The smaller the hole, the deeper the depth of field.
  • Bokeh is how we describe the blurriness in an image with shallow depth of field.
  • After that, we went on to talk more practically about how to find where the aperture is in your viewfinder of your camera, as well as how to change the aperture. Aperture Priority Mode is the setting you use if you want to be in control of your aperture, but you don’t want to shoot in Manual Mode yet.
  • We talked about lenses and how it may be hard to get a low aperture in your kit lens, so I recommended that you invest in a prime lens like a “NIFTY FIFTY”, or a lens that has a fixed focal length because they are much more capable of lower apertures.
  • Then I explained how the focal length affects different apertures by illustrating what the same aperture looks like with a few different lenses. We learned that lens compression plays a huge role in how blurry the background will look and that it’s easier to get a blurry background when you use a lens with a longer focal length.
  • To help you get started, we talked about some recommended apertures for various photos.

Single Portrait – Recommended apertures: f1.4 – f2.8

Group Shot – Recommended apertures: f4 – f8

Landscape/Long Exposure – Recommended apertures: f16 – f22

  • Then I showed you how aperture changes sun flare and we saw a video demonstrating how stopping down your aperture to a higher f-stop of f16 or in that range will give you starbursts from either the sun or any bright lights in your image.
  • Finally, we got advanced and showed you how aperture affects strobes and explained how shutter speed has no effect on your exposure when you use a flash.

New to this whole photography scene or wanting to brush up on your skills? I have a FREE online training called Show Your Camera Who’s Boss and would love to see you there!

To register, click the image below now:

Referral Link Copied!

Send it to your friends via text, email, or social media to invite them to TPM!

×
Select Your Camera
Please choose a camera for a personalized version of Master Your Camera.
Send this to a friend