You’ve seen countless stunning images of the moon and night sky, but do you ever wonder what it takes to capture these photographs?
Photographing the moon can be intimidating at first but once you get it down, you’re in for an incredibly rewarding experience every photographer should strive for.
Determining When to Shoot
One of the first steps to getting a perfect moon photo is planning when to venture out for your photos and knowing what scenarios will produce the desired results.
Time of Day
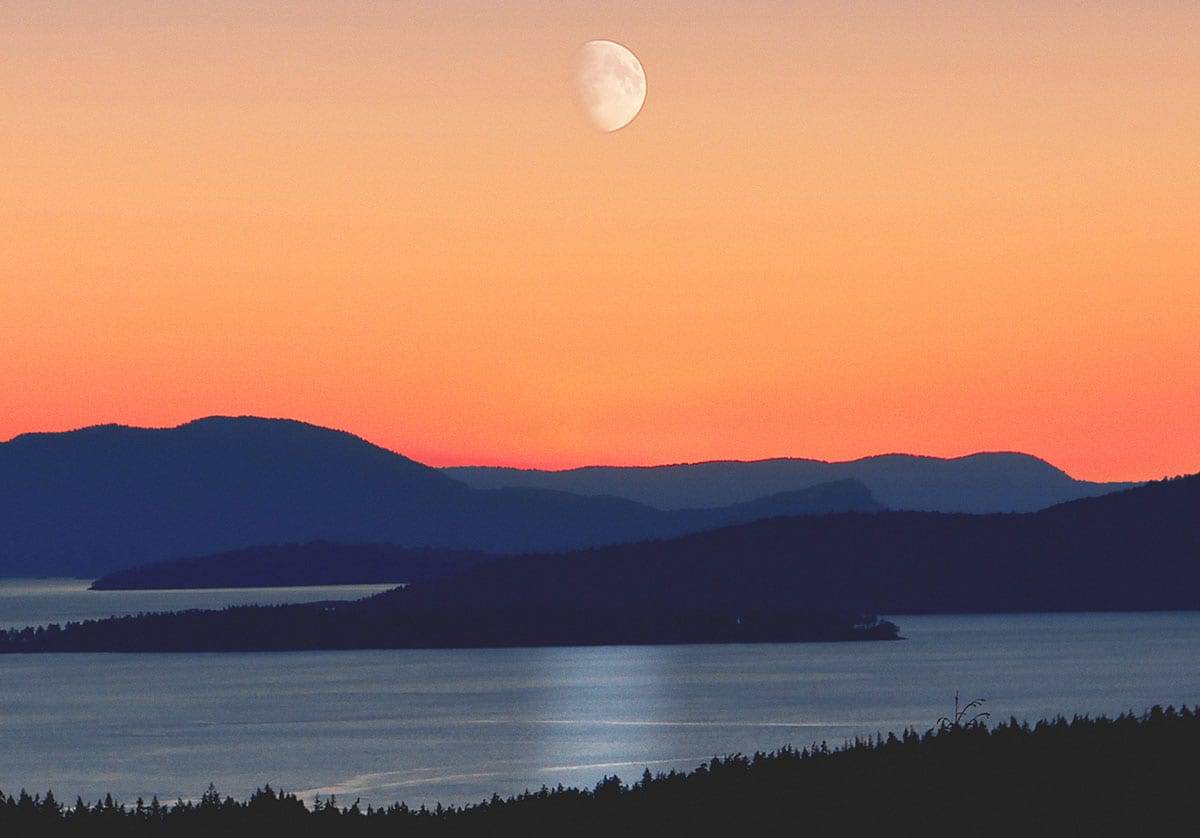
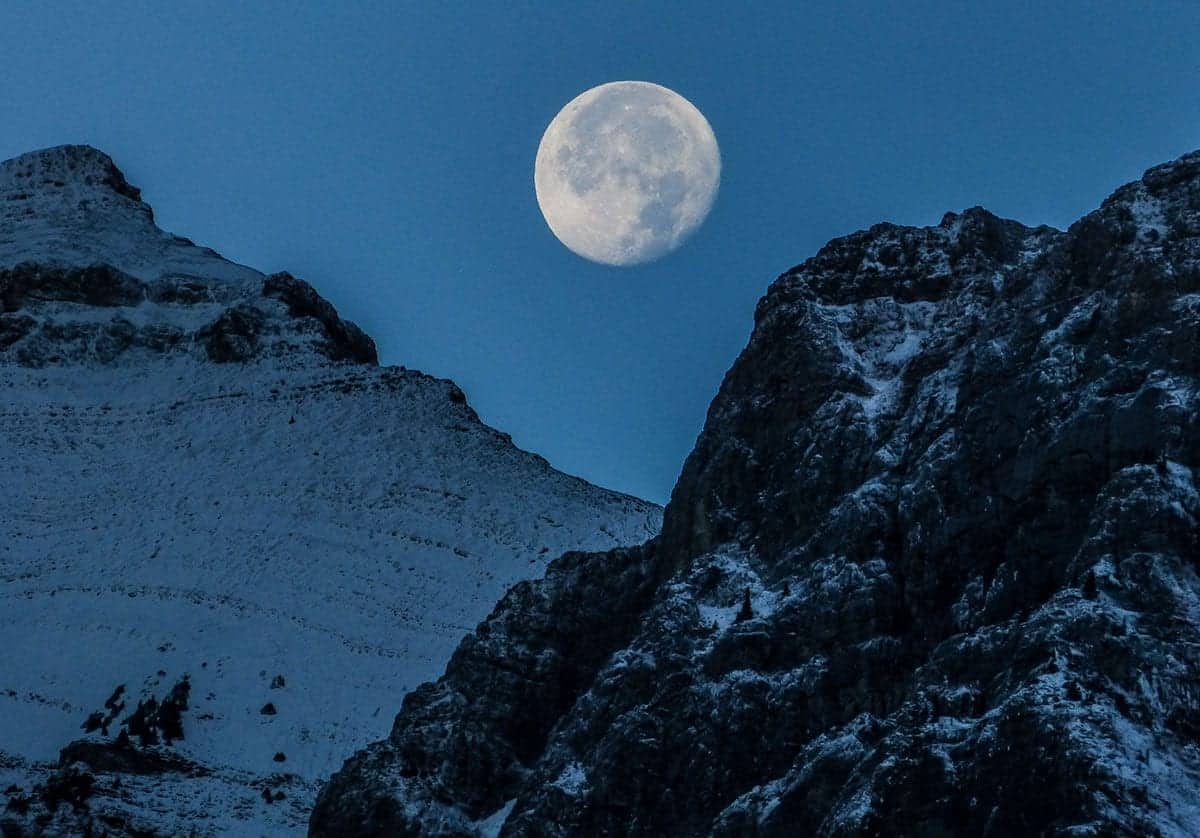
The best time of day to photograph the moon is either right after sunset or just before sunrise, which is displayed in the photo above. Doing so allows you to capture the moon when its closest to the horizon, which is when it's least contrasted against the sky.
This makes your job easier and gives you foreground imagery to work with, since the foreground will likely still be illuminated.
If you have a long telephoto lens, photographing the moon in the dead of night can land some beautiful detailed shots.
Crop in on the moon as tight as possible and use a lens that is at least 300mm when shooting the moon against an almost black sky.
Weather Conditions
The quality of your photos will greatly depend on the weather. If you’re looking for a photo with a crisp moon as the focus, make sure to shoot on a clear night when there are very little or no clouds. Higher elevations with no air pollution work best!
Moon Phases
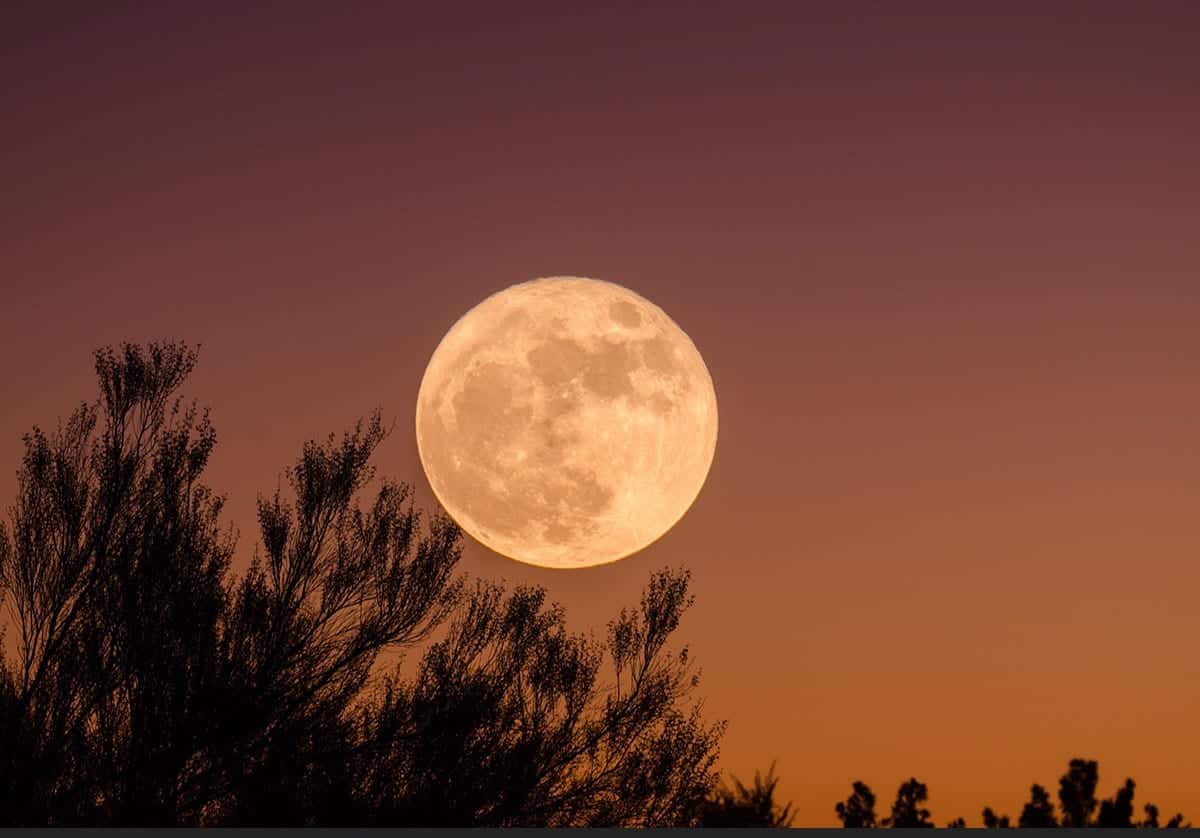
Actual full moon photos can end up feeling flat and dull, since the light is hitting it face on. If you want to photograph a “full moon” your best bet is to shoot the day before or after the actual true moon. Another great option is to shoot a Gibbous or Quarter moon, which will reveal the craters and shadows of the moon’s surface. You can find out what phase the moon will be in at any given time and place at this link.
Equipment Needed to Capture the Moon
The next step is making sure you have your equipment ready and on hand. Moon photography can be quite expensive, but can also be done with less expensive equipment if you’re willing to compromise on the type of shot.
At a bare minimum you’ll need:
- Tripod
- Remote trigger or cable release
- 55-200mm lens. 800mm+ preferred
Even the slightest movement will cause blur when shooting the moon due to how extremely far away your subject is, so a tripod and remote trigger are a must.
Your lens will of course make the biggest difference when taking a photograph of the moon. The longer the lens the better and using a telephoto lens is preferred. Using at least an 800mm lens will give you the highest quality images. If this isn’t in your budget, consider renting a lens for a one-time shoot!
Photographing the Moon on a Budget
Without using at least a 200-300mm lens, the moon will come out very small. This being said if you’re shooting the moon with a 55-200mm lens, afterward you can use editing software after shooting to create some stunning images.
If you’re working with less sophisticated equipment and still want to photograph the moon, instead of focusing on the moon itself, put the focus on the foreground and have the moon positioned nicely in the background of the photo.
Camera Settings to Use When Photographing the Moon
Although specific camera settings will differ widely based on the specific conditions you’re shooting in, there are some rules that should always be followed when photographing the moon.
Image Stabilization and Mirror Lock-Up
One of these is that the image stabilization feature is off to prevent blur, which should be done every time you use a tripod. This may seem paradoxical, but turning on vibration reduction when using a tripod will actually result in blurred images. If you’re camera allows for it, you also want to use mirror lock-up mode (MLU) to minimize shakiness.
Shooting in RAW
Using a format when shooting the moon is a good idea, which gives you significantly more power when editing the photos in post production. After all the work you put in to photographing the moon, you’ll definitely want this option! To learn more about the advantages of shooting in RAW read our RAW vs. JPEG blog post.
ISO, Aperture, and Shutter Speed
You’ll have to play around with the ISO, aperture, and shutter speed, so make sure to switch to manual mode. Don’t rely on the light meter when deciding on your settings, since the camera will be confused by the moon’s light.
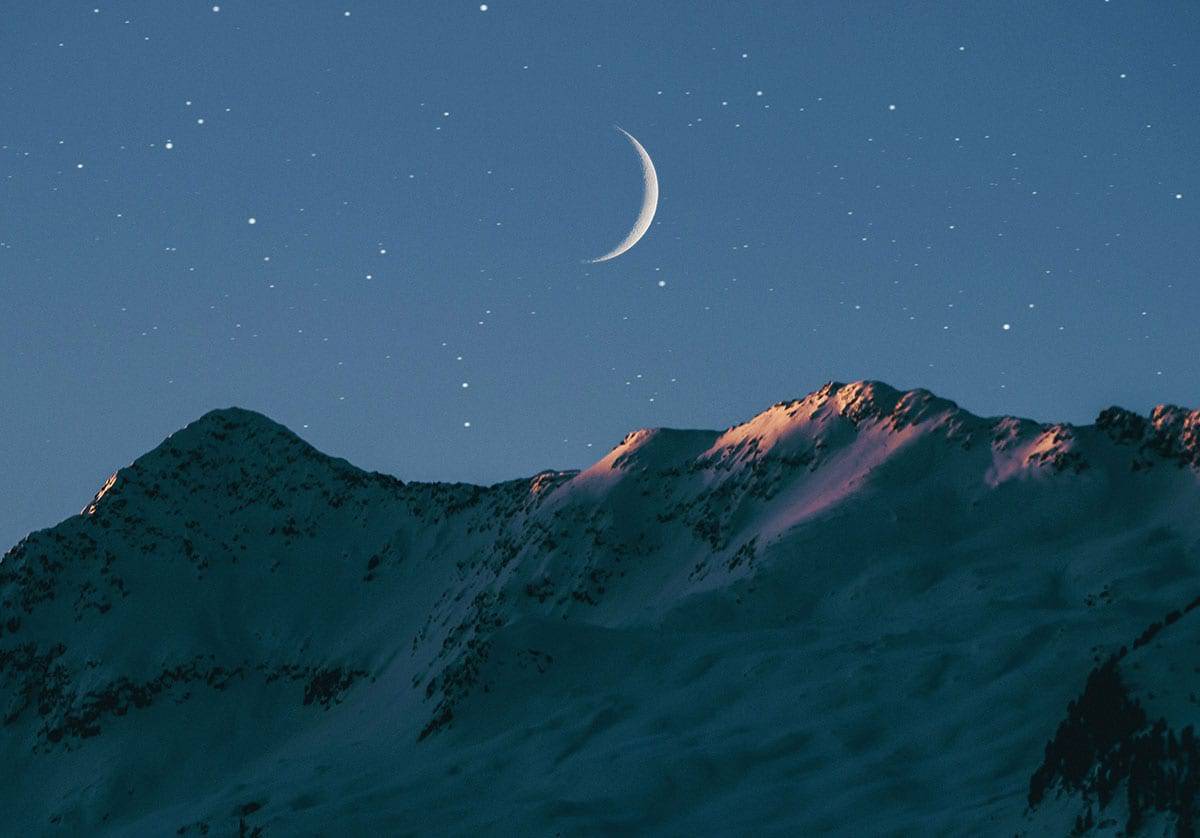
Considering the extreme brightness of the moon, most of the time you should be able to use your camera’s native ISO setting with good results. Some exceptions would be when photographing the moon in a landscape setting with lots of foreground imagery or when capturing an extreme crescent moon.
Although it doesn’t seem like it, the moon is moving in the sky at a fast pace and you’ll need a fast shutter speed to keep the image sharp. Using a minimum shutter speed of 1/125 to photograph the moon is a good benchmark. If you’re using a longer lens you can use slower shutter speeds but keep it at least 1/2 a second to prevent blur.
A good place to start overall is with your camera on the lowest possible ISO speed, an aperture of f/11 and a shutter speed of 1/250, and adjust as needed.
Importance of Composition with Moon Photography
Composition is very important when photographing the moon. If you’re capturing only the moon with no foreground imagery, place the moon in the center or use the rule of thirds to determine where it should be off-center.

When using foreground subject matter in your moon shots, some ideas are to photograph the moon as it comes over the mountains or ocean, or to frame it between objects.
Now that you have the tips you need to capture the moon’s beauty, get creative with it! You could try a day time shot, or try photographing a celestial event such as a blood moon, supermoon, or an eclipse. The opportunities are endless.
Need help understanding all the different dials on your camera? Join me for my free training called “Show Your Camera Who's Boss” and I'll show you how to use those dials!


97 thoughts on “How to Photograph the Moon for Astonishing Results”
Thanks!!!! Great information gonna try it out.
You’re welcome Lorilynn! Good luck!! 🙂
Thanks for very useful pointers. I will try it tonight
Thank you!!
Can’t wait to try it!
Love your explanation. I will try to capture some. Thank you.
You’re so welcome Lana, good luck! 🙂
Thank you for sharing the details of photographing the moon in different scenarios. Giving the photos camera setting details also helps so much.
Thanks so much for your kind words Tabetha! You’re so welcome 🙂
Thank you so much for the tips!
Thank you David this helps a great deal.
You’re so welcome Betty, thanks for stopping by! 🙂
Thank you so much for the detailed instructions on photographing the moon in different scenarios. The detailed camera setting information on each photo also helps.
Thank you for sharing.
Thanks for stopping by Zeni, you’re so welcome! 🙂
Thanks so much for all of this valuable information! I can’t wait to try it out!
Thanks so much Patti, can’t wait to see your results! 🙂
Thank you David…..just tried these settings and they worked perfectly!!! Hoping tomorrow the sky is just as clear as it is now.
I hope so too Carla! Things are pretty icky over here in TN, hoping it clears up soon!
Great information.Thanks for sharing with us..!!
You’re so welcome Vikrami!
Thank you, David, for another exceptional teacing aid.
I absolutely LOVE the way you explain things … both with these written guides AND the videos that you produce.
Thank you so much Mick, you’re too kind! Thanks for stopping by 🙂
Love the pictures I’m going to try it thanks
That’s awesome Leticia, good luck! 🙂
Thank You David for the helpful information can’t wait to get out with my camera again?
You’re so welcome Lynn, have fun! 🙂
Ty David. My photography has improved greatly with you lessons and emails like this. I can’t ty you enough.
Diane
You’re so kind Diane! Thanks so much and you’re so welcome! 🙂
Great tips. I tried the blood moon and took some interesting picures? not! Will try this tonight.
Oh man Louise! I totally get it. Can’t wait to hear how this time goes! Good luck!
WOW! Thanks for this!
You’re so welcome, thanks for stopping by!
What setting do you put for the camera? M- Manual, A- Aperture Priority, or TV-Shutter Priority?
I am thinking he used Manual. where he could control all of those settings, ISO, Shutter, and Aperture.
That’s right Holly! I only shoot in manual mode. Sherry – if you want to learn more about manual mode and how to use it on your camera, you can join me on my free webinar, “Show Your Camera Who’s Boss!” Click this link to choose a time: http://bit.ly/2NsvETK
Thank you for this information! I have been trying to get a good pic of the moon for a long time!! I love the shots of the moon that you included!!
You’re so welcome Lisa! Good luck. 🙂
Thank you for this. I appreciate it very much.
Thanks so much Marilyn, you’re so welcome!
I’m going to try it tonight fingers crossed.
Good luck Judy! 🙂
Thanks so much for sharing the moon photography! The extras you share are great and very educating, while easily explained so we may understand. Your time and information is greatly appreciated. You truly are a mentor. You Da Man!
Thank you,
Melanie G.
Thanks so much Melanie! You’re too kind. 🙂
GREAT INFORMATION AND I WILL TRY THIS WHEN THE WEATHER CLEARS UP. THANK YOU SO MUCH!!!
Thanks Julie! I know the weather is pretty icky over here in TN too. Hope it clears up soon for you!
This was a great article and explained so a newbie could understand. Tonight is Supermoon but the sky is dripping rain and very cloudy. I wrote all the options down and will keep trying to get a good moon shot until I succeed.
I hear ya Pat! It’s pouring here in TN too. Hoping it clears up soon! ☔️
I long for every tidbit you share and always learn something new- I may have missed it in your courses, but the bit about NOT using image stabilizer while using tripod….after many failed moons, eclipses and meteor showers- that is one mistake I will not make again!
TY
You’re awesome Elizabeth! So glad this was helpful for you. 🙂
Thanks, David, I love photographing the moon, and you have added tips that will help me. I am in Oklahoma and we are in the middle of snow/ice storm, so no moon shots tonight
Oh man! I hear ya Carol. It’s been raining buckets here too! Hopefully things will clear up soon. Have fun! 🙂
It’s snowing and I won’t get to see it but thanks for the info!
For sure Carla! It’s been pretty icky here too and hopefully things will clear up soon. Have fun!
Thank you for the info! I have been using my fujifilm finepix s 36x super wide 25-900 for all my moon pics because I couldn’t figure it out on my canon, but now I will try with these instructions! Thank you again!!
Thabk you for the info! I’ve been using my fujifilm finepix s 36x super wide 25-900mm to take my moon pics because I couldn’t figure it out on my canon. Now I can try with it. Thank you again!!
That’s awesome Buffie!! 🙂 Have a blast (to the ?)
?
Thanks so much!! Thanks for explaining the flatness effect of the full moon… I know I have gotten the creaters before…. just was not getting them on full moon shots!!!
For sure Lorraine! That’s awesome. 🙂 I hope you have the best time, good luck and have fun!
Hi,Thank you for all the help you give us…I’m always looking for new ways to shoot the moon..I’m not big on editing my photos, I like to take lots of pics until I get something I like. I know pictures look better when edited. ~Tina~
You’re very welcome Tina! I hope it helps to give you some new ideas! 🙂
Thanks for all the information I’m going to try this. Your details on everything is awesome.
You’re so welcome Carrie!
Thank you this is very helpful! I’ve taken what i think are some pretty great shots of the moon over the years, but quite honestly i just play with the settings until i get a good shot (not always remembering the setting for next time) LOL so this will definetely help me out!! Now to wait for a clear nite!! Thanks for your advice here!! 🙂
You’re so welcome Monique! I hope you get a clear night soon!
I used a Tamron 600mm lens, tripod, remote shutter release and settings of Manual, ISO 100, F/11 and shutter 1/200. The pics were all dark. Very dark. Which setting should I change first to get a brighter photo?
Hi CC! I would recommend raising your shutter speed a bit and ISO first and see if that may help! I hope that helps! Best of luck!
The sky is having some great activity right now. I have been reading the Almanac and My, If one could capture that. Moon was so big last night. Supposed to be meteor showers. Will try to take some tonight.
I hope you got some great shots Laura! 🙂
Thank you very much for this class
María
You’re very welcome Maria!
Thank you David. I am going to try this. I love your videos the information has been really helpful in my learning to use my camera.
My pleasure Deborah! So glad you are enjoying the content! 🙂
Great info. Can’t wait to try this
I hope you get some great photos Donna!
I have a Canon DID rebel. What is shooting RAW?
How do I set it?
Hi Renae! Check out this other blog post that I wrote: https://davidmolnar.com/raw-vs-jpeg/
I hope that helps! Have a good one!
Thankyou for the tips. I am still new to photography, but I enjoy your classes and tips. The biggest thing I learned was to turn the stabilizer off when using the tripod.
You’re very welcome Myra! I’m so glad you enjoyed it and found it to be helpful!
Thanks for the quick refresher. Full moon tonight!
My pleasure Liz! I hope you get some great shots!
I love the photography courses provided by David Molnar and his constituents. His courses are easy to follow and I can’t begin to tell you how much I’ve learned. Before I found David’s courses, I had tried to follow tutorials on Youtube but they talked too fast to understand or their topics were way over my head. Thank you so much for all your hard work and giving all of us courses we can follow and understand. You’re the best ever.
Thank you so much! I can’t tell you how much your words mean to me! I really like to present my information at a level (and speed) people can understand. They just want to become better photographers and I want to help them do that. 🙂
I guess I got lucky with my moon photos..point and shoot with a 100x zoom camera. Very tricky without a tripod 🙂
Can’t wait to try with this new info. Ty for sharing
A tripod will make is to much easier for you!
Thank you for the beautiful pictures of the moon. One of my fascinations. I appreciate the setting tips also. Too many trees around the house to get a decent picture, but it’s worth a try.
You’re welcome, Sally! I hope you do try to get that picture of the moon. Maybe you can find a place closeby with less trees. There is always such a feeling of capturing the beauty of the moon!
Thank you for your post. Very informative. I’m excited to go out and capture the moon.
Good luck, Priscilla! Enjoy and have fun capturing that moon!
Thank so much!! Needed this and plan to use it tonight!
Thank you for the 80 tips from southern Oregon.
Love the photos shared as examples
Great tips had never known. Have tried capturing the moon using tripod quite a few times which turned out alright but could be better from looking at your amazing moon shots. Absolutely wonderful! And thank you for offering free training to start. Looking forward to learning more from you and continuing the ongoing learning process with you. Thanks again David!
You’re welcome! I’d love for you to share a successful moon shots. Just keep practicing and you’ll get it!
Oh I didn’t know you should take considerations when shooting the moon, like perhaps shooting a day early before it’s in its final phase, or whatnot. That’s definitely a priceless tip, thanks for sharing!
It is good to practice, Lauren. You always want to get that shot you’re hoping to get….and practicing beforehand can help make that happen! I’d love to see any of your moon shots that you get!
All I have is 18-135mm, that’s lower than your recommended size but it’s what I have. What would be your suggestion for moon shots using it?
Absolutely try with your current lens! Work with what you have as you grow your equipment. Good luck!