- Total62
- Facebook14
- Pinterest15
- Email33

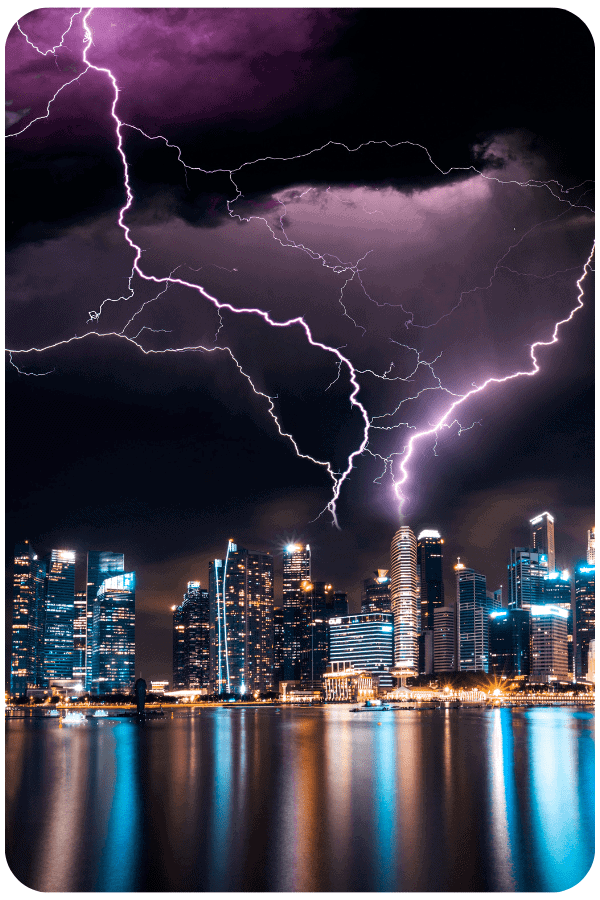
You’ve seen an amazing lightning photograph, right? Wouldn’t it be awesome to get one of your own?
Unfortunately, that is easier said than done. If you’ve ever tried to photograph lightning, the results were probably decidedly less impressive than you were hoping for.
But, don’t despair! Read on to learn about the equipment and techniques you’ll need to photograph lightning!
First Things First! Safety!
Most importantly, never forget the incredible power of a lightning strike. A single lightning bolt contains more than one billion volts of electricity. In practical terms, this is enough energy to power a small town for a whole day!
Imagine all that energy coming down on your head…or don’t because that’s awful.
Make sure that you follow these best practices to stay safe when you’re out in a lightning storm.
Do:
Stay in a place where you will be protected in case of a direct strike. This could be a car, building, or another similar object.
Don’t:
Be less than 50 feet away from water and don’t stand in an open space. Remember, lightning will gravitate toward the tallest object in the area. If you’re standing in an open field, that’s you.
You also don’t want to be standing under the tallest object, such as a tree.
Equipment
The right equipment is important for lightning photography. For many types of photography, you can still get great images even with just a smartphone. Lightning photography is significantly more difficult. Here’s what you’ll need.
DSLR or Mirrorless Camera
Food, portrait, or macro photography can all be done with a smartphone and a skilled photographer will still get a great photo. For lightning photography, a DSLR or mirrorless camera is virtually required.
You can get away with using a point-and-shoot, but only if it has a manual mode.
You need control over the shutter speed, aperture, and ISO to get a good photo.
It’s also important to take your images in RAW rather than JPEG. This gives you more flexibility later in editing to adjust the exposure, etc.
Lenses
Pretty much any lens will work for lightning photography. However, it will be easier if you have a wide-angle lens like a 24 mm or 35 mm. A wide-angle lens will photograph considerably more of your scene, which means you don’t have to be as precise about the position of your camera.
Zoom lenses are also handier than primes since you can more easily change the framing on the fly. However, a zoom lens is not required.
Keep in mind that you can use a telephoto lens if you want. However, you’ll want to bring your lucky rabbit’s foot with you. Trying to catch a lightning strike with a telephoto lens can be challenging to say the least.
Tripod
Another essential piece of equipment is a tripod. Trying to capture a lightning strike while holding the camera will virtually always result in a blurry photo.
You’ll need to leave the shutter open for a few seconds. Any movement at all during this time will make your image fuzzy.
Remote Shutter Release
You have to be so careful about camera shake that even touching it to press the shutter button can mess up your photo. For this reason, we recommend using a remote shutter release or infrared remote so you can fire the camera without touching it.
Some camera triggers are designed to automatically take a photo when it detects the lightning strike. This can be helpful if you plan to photograph lightning often.
Lens Cloth or Lens Towel
Here’s one most people won’t think about. It’s likely to be raining when you’re photographing lightning. After all, you’re out in a storm.
Bring a lens cloth or towel to keep the lens clear of raindrops. Otherwise, inevitably, your best shot will be ruined by a giant raindrop defect in your photo!

Locations
You need to find a good place to take your photo. This should be done ahead of time. Once it starts storming it’s not a good idea to be running around looking for a location.
Remember, while you can see lightning from many places, you need other elements to make the image interesting. Here are some ideas of what to look for as you scout locations:
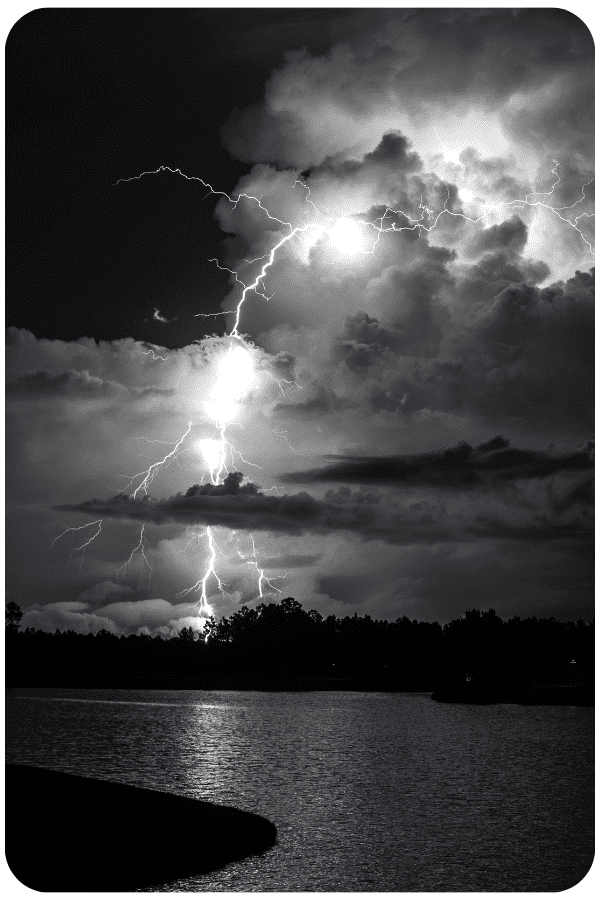
- Interesting foreground elements: The lightning by itself isn’t what makes a lightning image awesome
- A good field of view: Try to pick a spot that has a field of view in more than one direction. This will give you more flexibility when photographing.
- Lots of sky space: To give you the best chance at capturing a good lightning strike, you need to be able to see a big part of the sky.
Try to choose a place close to where you live so you can drop everything to get there quickly once the storm starts.
Recommended Camera Settings for Lightning Photography
Now let’s get to the technical stuff. Proper camera settings are crucial for getting the best lightning images.
Manual Focus
Autofocus is a fantastic feature that most photographers use heavily. However, it doesn’t work too well for lightning photography for two reasons.
First, cameras need light to autofocus. Lightning photography often happens at night and your camera will have a hard time acquiring focus in the dark.
Second, it can mess up your focus, especially if you haven’t switched to using back-button focus. Imagine having your camera all set up and ready with the focus locked in. Then, when you go to take the picture, the autofocus kicks in and starts searching (unsuccessfully) for the focus point.
Yep, you end up with a frustratingly blurry photo.
Instead, set your focus to manual and focus to infinity. Do this by adjusting your focus to the distant horizon. Take a couple of test shots to ensure you’ve got it set, then leave it alone.
ISO – 100
You might assume that you need to crank up the ISO for the low-lighting conditions. However, this is a mistake and you’ll end up with disappointingly noisy (and probably overexposed) images.
Aperture F/22
You’ll want to use the smallest aperture setting, which on many lenses is f/22. This is necessary for a couple of reasons.
First, you’ll probably want your foreground elements to be in focus. Since you set the manual focus to infinity to get the lightning strike, you need a big plane of field to include the foreground as well.
Secondly, you need to restrict the amount of light entering the camera. This sounds backward but we’re going to explain why now.
Bulb Mode
Set your camera to Bulb mode, which on most cameras is denoted by a B on the mode setting dial. In this mode, the shutter opens when you depress the shutter button and stays open as long as you are still pressing it. The shutter closes whenever you release the button.
In this mode, you are not restricted to whatever shutter speed settings your camera offers. Plus, this allows you to ensure the shutter stays open until after the lightning bolt strikes.
Of course, you can’t leave the shutter open indefinitely. Your image will end up getting overexposed. Try a few test shots to get an idea of how long you can leave the shutter open without overexposing your image.

Alternate Settings
The downside of bulb mode is that your finger can get tired of holding down the button. Here are the recommended settings for lightning photography when not using blub mode.
ISO 100
Keep your ISO at 100 to get the cleanest image possible.
Aperture f/5.6
You won’t be holding the shutter open for as long when not using bulb mode. This means that your camera will need more light to properly expose your image. Try setting your aperture at f/5.6. If your foreground elements are far away, the reduction in depth of field won’t affect your image too much.
Shutter Speed
Choose your shutter speed based on the lighting conditions. Don’t forget that the intensity of the lightning will have an effect. Aim to underexpose your image somewhat in your test shots; then, once the sky lights up you should get a properly exposed image.

Composition
We’ll just state the obvious here; composing a lightning image is hard. Your subject isn’t even there when you set up your camera and it only flashes for an instant.
With this in mind, you’ll want the sky to make up approximately 60-80% of the image. It will look boring in your viewfinder at first, but that’s because the subject isn’t there. It will look just fine once the debutante shows up.
Also, since you can’t predict where the lightning is going to strike, use a wide-angle lens and keep your shot wide. This gives you leeway later to crop in to the exact right composition.
Create Amazing Images
Photographing lightning gives you a distinct opportunity to create amazing landscape images. But learning how to photograph lightning isn’t easy. It takes preparation and a little luck to get the right images.
However, armed with the tips and settings for lightning photography we’ve provided here, you can get some awesome images. Give it a try!
- Total62
- Facebook14
- Pinterest15
- Email33


