- Total73
- Facebook14
- Pinterest15
- Email44
We can now use artificial intelligence to improve the world in many ways, yet many must be made aware. As a photographer, you should realize that you can harness the power of AI with your digital camera whenever the shutter is pressed.
Aside from using AI technology, photographers can even utilize AI to perform tasks that increase their workflow and improve their photography. In this article, we will explore several ways photographers can use AI in their photography.
What is Artificial Intelligence (AI)?
When most people think of Artificial Intelligence, or AI, they look at it like an exotic human type of intelligence or consciousness. In reality artificial intelligence is a misnomer. A better name would be Artificial Data Analysis. An AI can take an enormous amount of data and go through it in an extremely short period of time, and using advanced algorithms, can use this data to answer questions.
Some forms of digital intelligence include Google Assistant, Amazon’s Alexa, and Apple’s Siri. This digital assistant can understand our words and transform them into various tasks.

You can even use AI on Netflix to ask for recommended movies you could be interested in. And AI can also improve your photography or creatively make art.
Several photo editing software utilizes AI technology for tasks like adjusting contrast, exposure, and even sharpening your image or removing noise. Photoshop allows you to use AI to create a sky layer mask, or use generative AI to use their photo database and insert an object you request into your photo.
How Photographers Utilize AI
It is a simple task to use AI. There are several ways photographers can use AI apart from photo editing. AI can expedite tasks and save time that would have affected your productivity. Here are some examples of how photographers can implement AI into their workflow:
Editing
Every photographer can use AI for editing pictures. AI allows you to edit your images easily and quickly and add modifications to them. You can use AI to fix contrast, saturation, and exposure, which saves you time in your editing workflow.
Also, photographers can use AI to reduce noise, upscale images, and sharpen blurry photos. You can use the noise reduction tool to make a cleaner image when intending to shoot in low light conditions.
AI can help you reduce noise and also maintain a high-quality image. Also, if your subject moves or you miss your photo focus, AI can help the subject look sharp. AI can also help you maintain resolution after cropping or creating large prints.
One of the cutting-edge AI editing features in recent times is Photoshop’s generative fill feature. Photoshop’s AI generative fill is a powerful tool that lets you quickly load, edit and remove image elements in just a few clicks.

With machine learning AI, the features create parts of an image or even a whole compost photo in less time than it would take a human to do it.
Each image pixel is analyzed and matched with the corresponding shadows, coloring, perspective, and lighting, which results in a highly realistic work of art.
As a non-destructive tool, you can quickly revert changes you don’t like since the tool organizes all generated elements into a layer with a layer mask.
With this, photographers can quickly improve and modify their designs with Photoshop's other tools like filter effects or blending modes. Even better, you can also use it with your Photoshop keyboard shortcuts.
The Photoshop generative fill tool is an excellent feature for photographers because of the following:
- Allows creativity: User can quickly realize their creativity by removing, adding, and expanding content in an image with a text prompt
- Complex editing: Generative fill is an exceptional tool for retouching, refining, and reworking images. For instance, you can take any picture and turn it into something else.
- Create images: The generative fill tool can create realistic objects, backgrounds, or a complete image.
- Remove unneeded elements: You can easily remove unnecessary elements from your image with generative fill.
Create an AI mood board
For commercial photographers, clients can request you create a mood board before shooting. The creation process might take too long if you already have a vision for the shoot. But, with AI technology, you can expedite the creation process.
You won't need to search the web for hours for a specific image.

Plan a model’s look
If you are a portrait photographer, you can use the AI tool ChatGPT to suggest the model’s makeup, wardrobe, and or hair.
Also, you could even ask ChatGPT for things like “Where is the best place I can take a portrait in New York?” or “Can you suggest examples of several poses for female models?”
To keyword images
There is software that uses AI technology to keyword images. This is particularly important for photographers because you can easily search for images via a simple keyword.
When AI makes a keyword, you don't need time to keyword all photos. Instead, the tool automatically reviews your pictures and then constructs the keyword for you.
To cull through images
You can use AI tools to cull through the images for a wedding occasion when you take many photos at once. AI tools can import many pictures at once and then point out the images with an out-of-focus subject or where the eyes are closed.
This saves you hours you would have spent reviewing your computer, flagging good photos, and removing bad ones. Utilizing AI will help you increase your workflow speed and do more in less time.
Photoshop’s Generative Expand
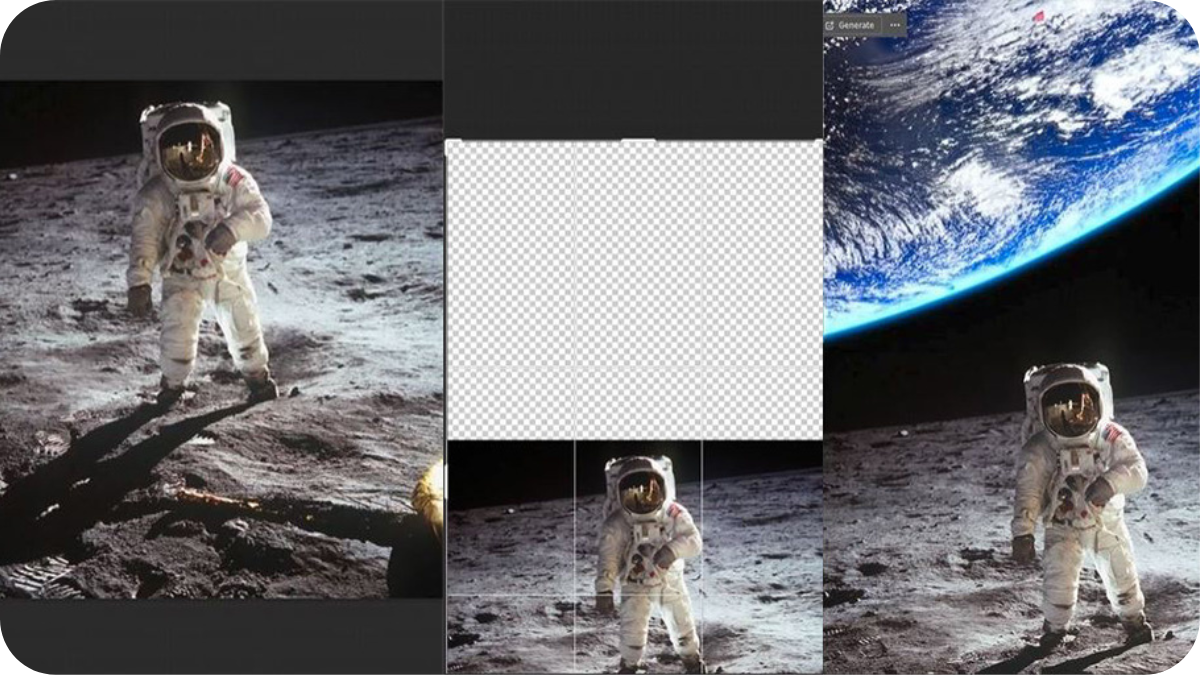
Photoshop’s AI has several areas that it be used to manipulate photos. The first is Generative Expand. This will take a photo and by stretching the areas around the image, will allow you have the AI fill in the new areas with what it feels is what would have been right off camera. You can do this by doing the following:
- Open a photo in Photoshop
- Using the crop tool, pull the sides or top that you want to expand on your image. Make sure the fill is set to Transparent and chose the check mark.
- Choose the selection tool and select the transparent areas, but make sure to have some of your selection box go into the edges of your image.
- Click on the Generative Fill dialog box. Don’t enter any text and hit the Generate box.
- This will generate the selected areas as to what it may have been. You have 3 choices that have been created. Choose the one you like the best.
- At this point you can also add something to your image. In the properties area of the Generative Layer, there is a Prompt: area. You can type something in there for it to add and then hit Generate to see how it will add that item to the selected areas.
Photoshop’s Generative Fill
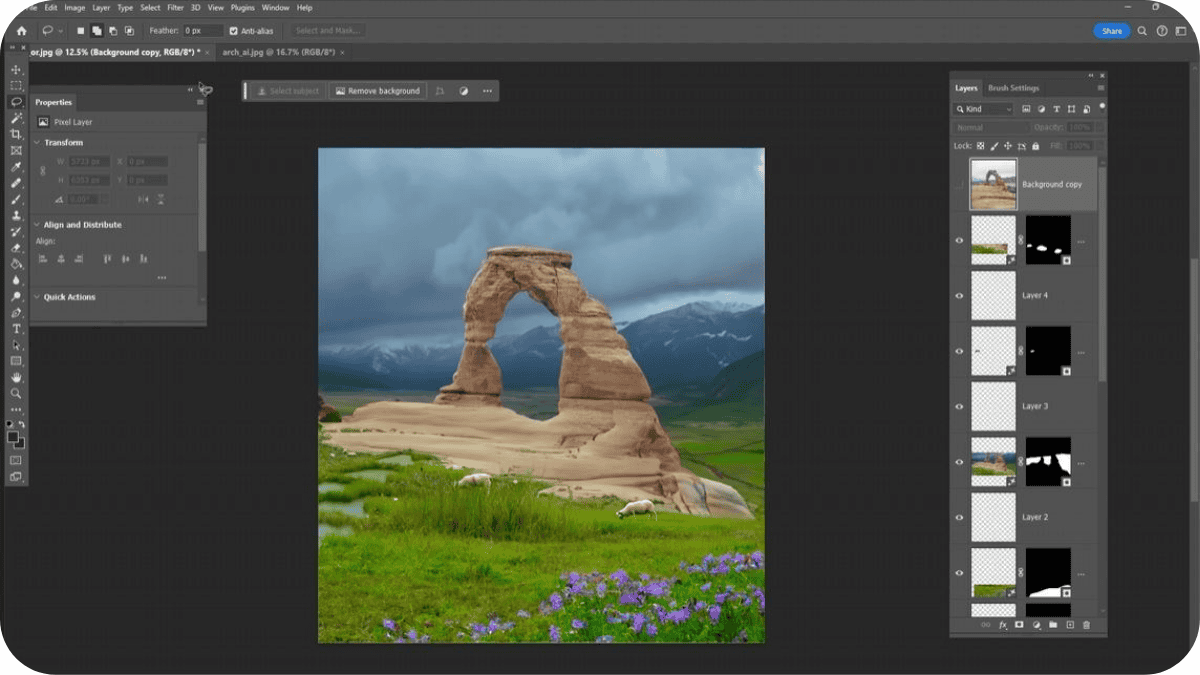
With Photoshop’s Generative Fill, instead of just extending the edges of a photo, you will be working more with adding new elements to the photo. To do this, you will select areas and tell the generative fill to do something in those areas, such as change the sky to a bright sunny day, or to add a sunset to the sky. The difference between this command and sky replacement is that you are not taking a photo of a sky and inserting into your image, you are actually drawing a brand new sky. You can also add items like people, animals, or objects. You can do this by doing the following:
- Open a photo.
- Use your selection tool, the lasso tool is typically very useful here, and select an area in your photo that you want to generate something. For example, select the sky if you would like to change something about it. Try to keep a little of the photo that you don’t want changed in the edges of your selection so Photoshop knows that you want to keep those edges.
- Click on the Generative Fill toolbar and type in what you would like to fill in that area. For a sky you may type “sunny sky with large puffy clouds”.
Click Generate. - As before, you will have 3 selections to choose from. If you don’t like those, you can select generate again to get more options.
- You can do this as many times as you like in the image to add other items. All you have to do is make more selections and type in other objects you would like to add
It is important to remember that the hierarchy is very important. You want to always create the new AI layer on the top as it will take the rest of the image and actually merge the new items into it the previous layers. If you try to use generative fill in an earlier location, it will not merge in with anything after it which will cause some issues. Also, if you find that generative fill creates a small anomaly, selecting that area and using generative fill again will typically remove them.
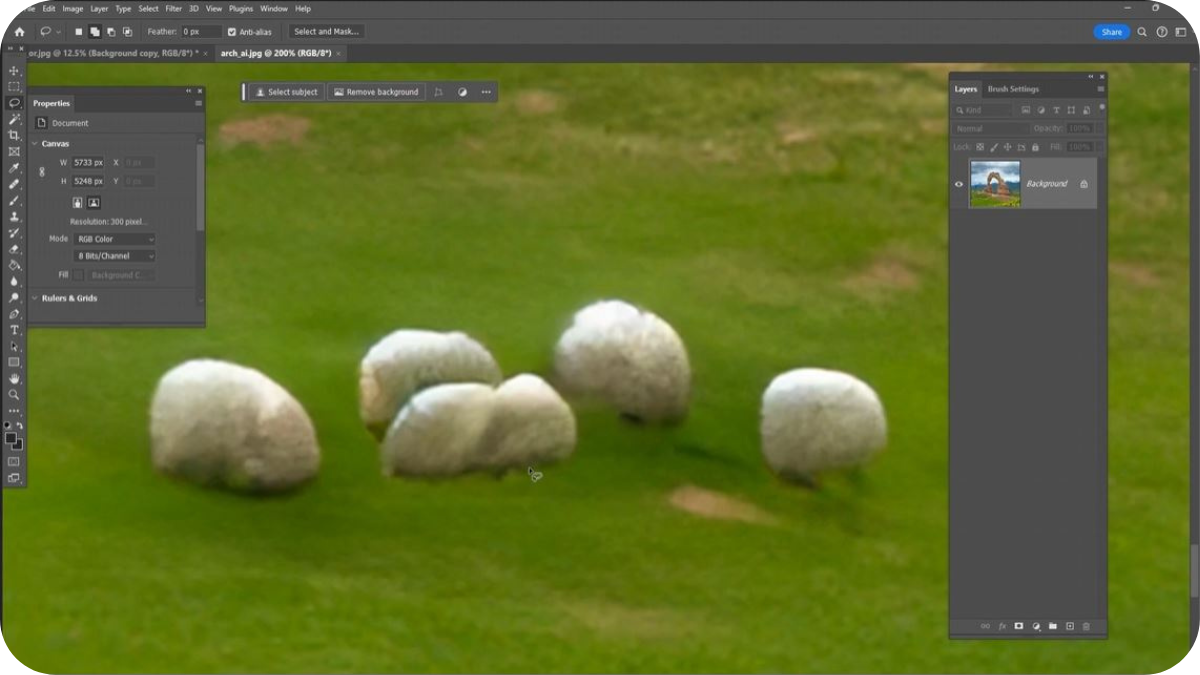
One thing to note, AI is not perfect, especially when you want it to add high resolution or detailed items. It will not always make them turn out perfectly. An example of this can be seen in the below photo where you can see the sheep that Photoshop AI added didn’t quite come out right.
Conclusion
With the advent of AI, the future of photography is exciting, combining human ingenuity with AI. This combination proposes limitless possibilities, making the creative journey more accessible than before.
Photography and Artificial Intelligence are no longer detached. They are now partners in a pictorial storytelling adventure.
Photographers can use AI as the wand for simplifying everything complex. So, every photographer should get ready to use this magic wand and begin their delightful journey of creating a fantastic story.
Our Photoshop AI course goes into even more detail about Photoshop AI. Click the link to take a look at the trailer!

- Total73
- Facebook14
- Pinterest15
- Email44


