What are Lightroom’s Best Features?
Well, there are so many incredible, powerful features to choose from in Lightroom that it’s hard to pick just a few!
From Batch editing, to keywording, RAW file and non-destructive editing, it’s no wonder that Lightroom is the pro photographers’ first choice for photo management and editing.
So as hard as it was, I’ve limited my list of best Lightroom features down to the ones that I love the most.
I’ve organized my favorites by photo organization, editing and mobile features.
Section I – Photo Organization

Managing a large number of photos can turn into a nightmare fast.
Dealing with all those photos really gets frustrating when you need to retrieve specific images months or even years later.
I can’t think of anything worse than having to scroll through hundreds (or even thousands!) of photos just to find the right one.
That’s why Lightroom’s organizational features are such a godsend.
The Lightroom Catalog

The Lightroom Catalog is a lot a card catalog in a library.
When you pull open a drawer in a card catalog, it doesn't contain the actual book you're looking for. It only contains information about the name of the book and on where to find it in the library.
Lightroom's Catalog is similar in that its Catalog only contains basic information about every photo you’ve ever imported – it doesn't hold the photo itself.
Instead, the Catalog contains a record of all your photos, including where they are stored on your internal or external hard-drive.
By default, Lightroom organizes the Catalog into folders, with a default folder for the year, and a subfolder containing the month and day the photo was imported.
You can rename these folders, but be careful!
The reason for this is that many times you’ll have photos from more than one shoot on your memory card.
Let's say that you have photos from your beach vacation and from the latest wedding you shot as well.
If you rename your folder “Wedding” it's going to make it really difficult to find your vacation photos at a later date.
Lightroom Collections
One way to get around this is to organize your photos by Collections.
You can have a top level Collection, say, “Wedding.’
Then you can create individual collections that sit inside the top level collection (e.g. “Smith wedding”, “Jones wedding,” etc. ) for easy retrieval later.
Lightroom will even help you create Collections with its Smart Collection feature.
What the Smart Collection does is automatically place all photos with a specific name into a collection for you – what could be easier?
Speaking of photos with the same name, let’s look at how to keyword your photos with Lightroom.
Keywording is one of the best Lightroom features going!
Keywording Your Photos with Lightroom

Keywording your photos inside Lightroom makes it a breeze to find them later.
Instead of needing to sort through a massive amount of photos, Lightroom’s keywording feature allows you to call up photos with a certain keyword applied in just a few clicks.
This feature is a massive time-saver!
How to Apply Keywords to Photos in Lightroom
There are several different ways to apply keywords to your photos in Lightroom.
The first way is through keyword tags.
To use keyword tags, switch to Grid View in the Library Module.
Select the photos you want to apply your keyword(s) to.
To quickly select similar photos in a series, click on the first one, then click on CTRL on a PC or COMMAND on a Mac.
Next, click on the last photo in the series.
Lightroom will then select the entire series for you.
Next, apply your keywords in the Keywording module located to the right of the Library module. (You can add multiple keywords by using a comma between them.)
Applying Keywords with Lightroom’s Painter Tool

This is a fun, fast and easy way to apply keywords, as well as apply flags, ratings, metadata or develop presets to a series of photos.
To find the Painter tool, click View > Show toolbox.
You’ll see an icon that looks like a can of spray paint on the bottom of the Grid. Enter your keywords to the right of the paint can.
As you move the paint can across your photos, click on them and the keyword you specified earlier will be applied.
The Painter tool is great when you’ve imported photos with several people at the same time.
Just change the keyword and apply the new keyword to the right people.
For instance, let’s say you took pictures at a family reunion in no particular order.
When you review your photos, use the Painter to add tags like “Dad”,“Cousin Bill,” “Jim” etc. as you come across them.
Apply Keywords on Import

One of the most efficient ways to apply keywords to your photos is to apply them during import.
Let’s say you shoot a wedding for a couple named Smith & Jones, and those are the only photos on your memory card.
By applying the keyword “smith-jones’ on import, you’ll be able to easily find photos from that series in the future.
You can even add multiple keywords by separating them with a comma.
To apply the keywords during import, press the Import button.
A dialogue box will appear where you can enter your keywords.
Retrieving Your Keyworded Photos
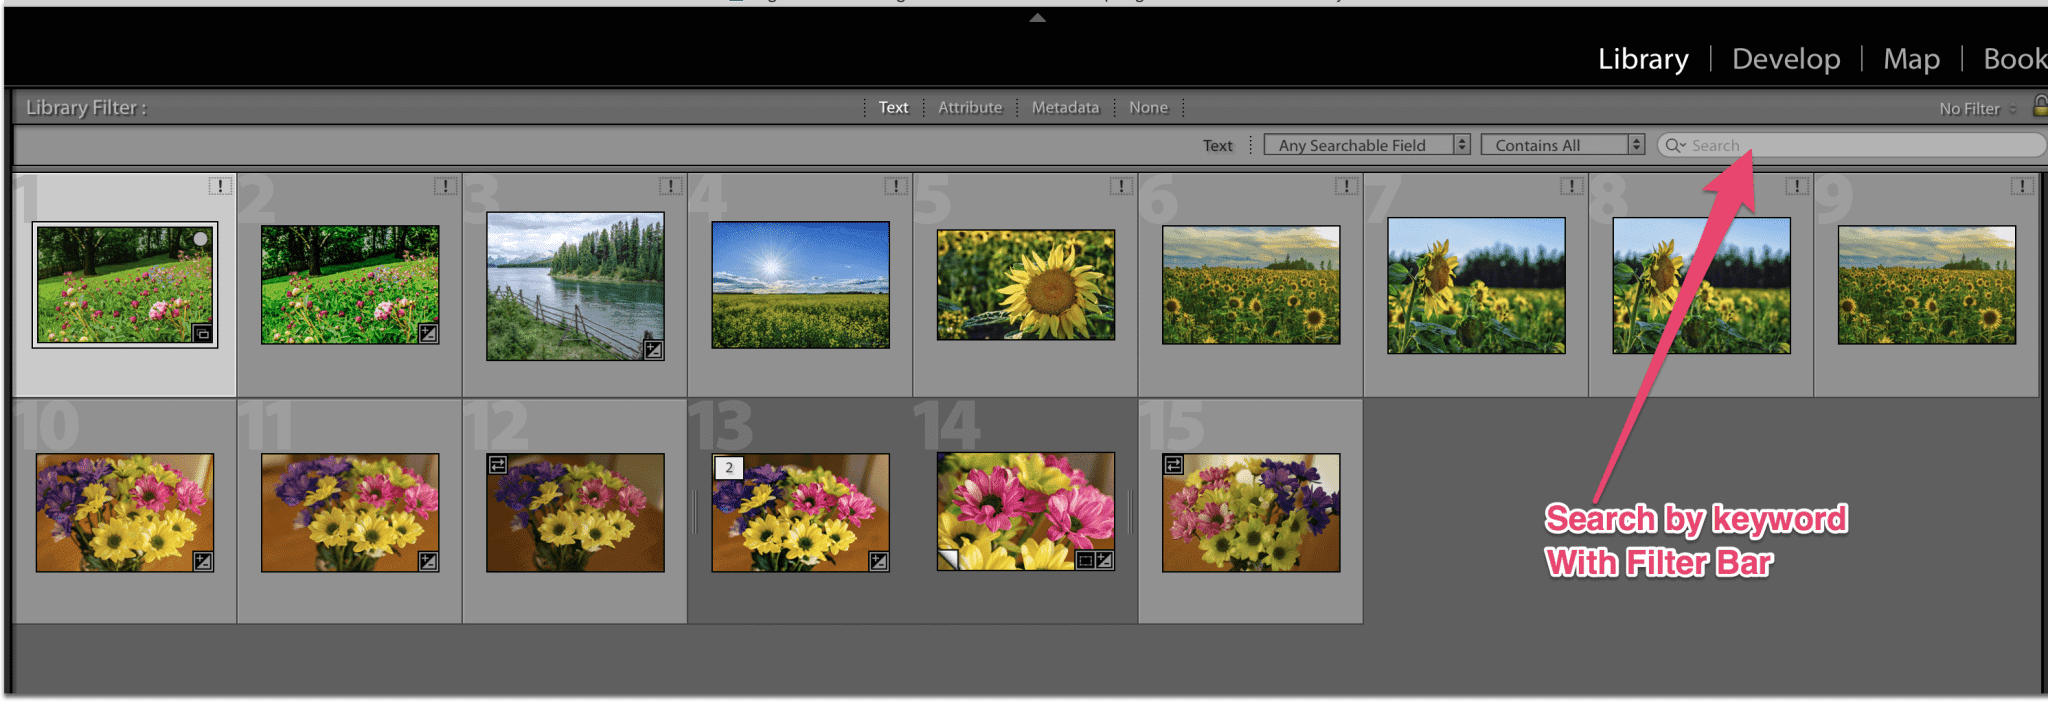
There wouldn’t be any sense to keyword your photos if it didn’t make it easier to find them in the future, right?
Lightroom makes it super easy to find your keyworded photos with just a few clicks!
From the Library module, click View > Show Filter Bar.
Click on “Text.”
Now you’ll see a list of all of your keywords. Click on any keyword to bring up all photos tagged with that particular keyword.
Or use the Search function to enter your keywords.
Keywording is an amazing Lightroom tool for organization and photo retrieval, but there's another feature I think is even better!
This Might Be Lightroom's BEST Feature
This has only been the tip of the iceberg of Lightroom’s superb organizational features.
While Lightroom was developed as a cataloging and photo organization tool, over time it’s editing features have massively improved.
Many pro photographers use Lightroom as the workhorse in their editing process, using Photoshop more just to tweak and refine their very best photos.
And one thing I love in particular about Lightroom is its batch editing capabilities.
Save Massive Amounts of Time with Lightroom Batch Editing
In my opinion, the ability to use presets for batch editing is one of the most powerful features of Lightroom.
In case you're not familiar with presets, they are a lot like using a cake mix to speed up the process of baking a cake.
Presets do nearly all the adjustments to exposure, color, detail and effects to your photos automatically. (You might have to tweak them a little to your preferences.)
Presets are ideal to use if you have a collection of photos that will need similar adjustments to exposure, white balance, tone, etc.
Using presets ensures that your photos have a consistent look, so important when you’re doing client work.
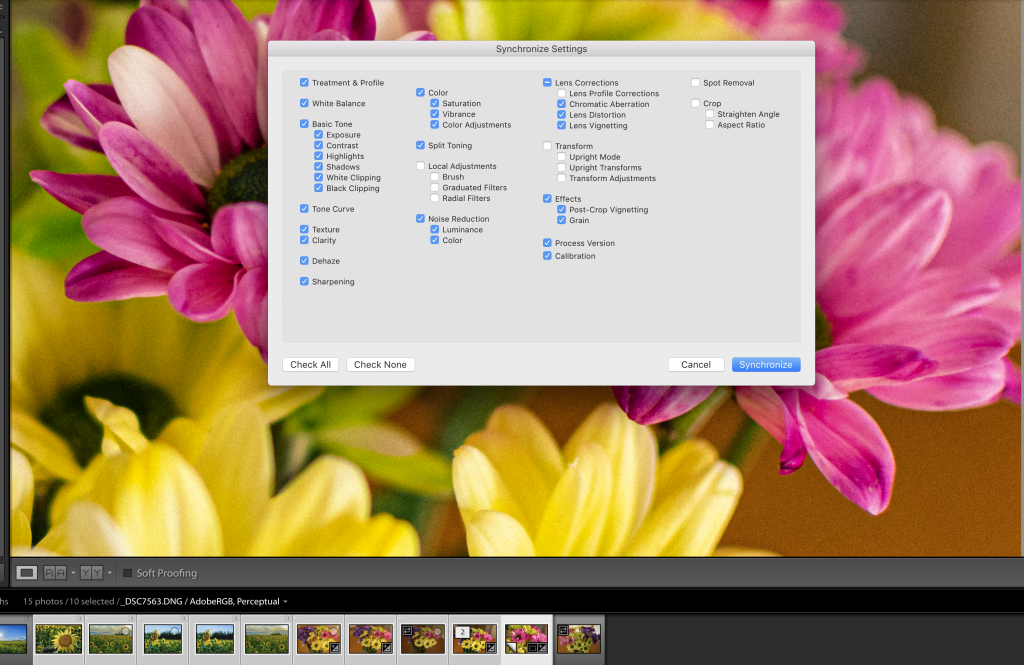
How to Create Your Own Presets
You can create your own preset by adjusting a photo, then copy/pasting the settings to other photos.
To do this, edit your photo in the Develop module using the adjustment sliders.
Next, select the other photos that you'd like to apply these same settings to (for best results, choose similar photos.)
Click the “Sync” button and use the check boxes to select/deselect the settings you wish to apply to your selected photos.
Using Commercial Presets
In a big time crunch and don't have time to mess with creating your own presets?
Then you can purchase high-quality presets created by professionals.
With commercial presets you can find specific looks to add to your photos, like light and airy, dark and moody, high contrast, etc.
One thing I love about ready-made presets is they let me try out editing styles I never would have thought of on my own.
If you've never tried them, you're missing out!
As well as the convenience of editing with presets, another thing I really love about Lightroom is that it's a non-destructive editor.
Non-Destructive Editing
One of the most freeing things about editing in Lightroom is that you can experiment with editing adjustments and presets without ever destroying your original image in the process.
It’s a very welcome feature after years of editing in layers in Photoshop!
One goof in PS can be fatal to your original photo if you forget to create layers for each editing step along the way.
If you think you’ve made a mistake in Lightroom, relax.
Just hit ‘Reset’ on your original photo in Lightroom Classic to bring it back to it’s unedited state.
Or, if you work in Lightroom CC, click on ‘View’ and choose ‘Show Original.’
Lightroom has yet another editing feature photographers love. And that’s the ability to edit RAW files.
RAW File Editing in Lightroom
RAW files are preferred by most photographers because the format retains information from your camera's sensor without processing or compressing it in the way a JPG file does.
The major advantage of this file type is that this retained information gives you more freedom to make adjustments to your photo in post-processing than JPG files do.
The catch?
RAW files can’t be opened by most online photo editing software.
But this isn't a problem for Lightroom.
Lightroom contains the same basic adjustment sliders as Camera RAW in Photoshop (plus some very cool adjustment features of its own!)
Lightroom’s Adjustment Tools

I love the transformations you can achieve with Lightroom’s tools.
The Radial and Graduated Filter tools are both excellent for correcting specific areas in a photo without making global changes that would affect the entire photo.
For example, the Radial Filter is a great tool for adding a little light back into your subject’s face when your lighting conditions are less than ideal.
The Graduated filter tool helps tone down overly bright skies with just a few clicks.
And if you need to touch up an area, Lightroom’s Adjustment brush makes it easy to tweak areas of a photo without making global adjustments that affect the entire photo.
Tip: Use the Eraser tool (found with the brush) if you go a little too far with any of the above adjustments.
Lastly, the Heal/Clone tool helps you remove unwanted spots from your photo.
However, if you need to remove entire objects from your photo, Photoshop does a better job with Content Aware.
Print/Publish Features

Export Settings for Resizing and Resolution
Lightroom allows you to specify the size and resolution of your photo upon export.
This allows you to export your photos in optimal sizes for social media, and print.
Note, if you want to print your photos, check with your lab first, because the size you think you need, might not be right!
For example, if you’re printing on canvas, you need to export slightly larger than the finished size to wrap your print around the edge of the canvas.
The lab will also tell you the correct resolution to export your photo in.
How to Access Image Sizing
Access image sizing settings by clicking on ‘File > Export.’
A dialog box will pop up.
Scroll down until you get to ‘Image Sizing’ and input your desired export size and resolution.
Polish Up Your Photos Before You Print Them
Speaking of printing your photos, did you know that Lightroom has a feature to improve colors, provide crisper detail, remove artifacts and provides more accurate edge rendition for prints?
It’s called ‘Enhance Details.’
To access it, simply right click on your image when you’re happy with it and ready to export it. You’ll see another dialog box open.
Select ‘Enhance Details’ and let Lightroom work it’s magic.
When it’s finished, apply your export settings as above.

One for the Landscape Photographers
Landscape photography can be quite tricky because it’s easy to blow out the sky, while underexposing the foreground of your image.
One ways that landscape photographers deal with this is by using bracketing and HDR (high dynamic range) processing tools.
Bracketing is a process that captures three or more identical with photos at different exposures in order to capture all of the detail in a scene. The photos are then blended together.
Lightroom has its own HDR tool to blend bracketed photos. To access it, select your bracketed photos and right click on the last one in the series.
Select HDR merge, and leave the auto-align box checked, as it will correct any little movements you’ve made if you shot the bracketed series handheld.
It’s up to you whether or not you use the auto-tone box checked. If you’re a perfectionist, you’ll probably like to adjust the tone manually.

Deghosting in Lightroom HDR isn't Perfect Yet – So Use with Caution!
There is a deghosting feature in the HDR module, but the results are hit-and-miss. (Deghosting removes unwanted movement in your bracketed photos – say a person walking across your frame as the camera captures the photos.)
I find that it's better to remove objects in your bracketed photos before you merge the images instead of relying on the deghosting feature at this point in time.
You can also merge your photos in Lightroom to create panoramas and HDR panaramas. Access these features the same way as HDR processing.
Tip: If you have a photo that could have benefitted from bracketing, or your camera lacks an auto-bracketing feature, you can try this workaround.
Adjust your photo to your liking, then make two copies of it.
Deliberately underexpose the first of the copies by one stop compared to your original and overexpose the other copy by one stop.
Then put the series through the HDR merge just like above.
Section III – Lightroom CC and the Mobile App
So far in this post, I've referred to features found in Lightroom Classic, which is the version of Lightroom I use.
Lightroom Classic is a desktop editor and photo organization tool.
But if you subscribe to Adobe's Photography Plan, you also get access to Lightroom CC along with Lightroom Classic and Photoshop CC.
The difference between desktop-based Lightroom Classic and Lightroom CC is that the later is an online photo editor with included cloud photo storage.
And one thing that makes this version of Lightroom great is that it syncs with the free Lightroom Mobile App.
Sync Your Photos, Profiles and Presets to Lightroom Mobile
If you’re a Lightroom CC user you can automatically sync your Albums, presets and profiles to the free Lightroom Mobile app.
This allows you the convenience to edit straight from your smartphone or tablet.
Whether you’re on vacation or on location, it’s handy to have a tool to quickly edit a few photos for social media.
For example, wedding parties often ask for a few photos to post on social media while the reception is going on.
And the Lightroom Mobile app is perfect for this purpose…you don't even have to drag a laptop along with you to the wedding!
And since any presets you add to Lightroom CC sync over to the Lightroom mobile app, it's even faster to produce quality edits in a hurry.
As well as being a great editing app, Lightroom mobile is a fantastic smartphone camera app too.
It has lots of features you’d be hard-pressed to find anywhere else.
(In fact, I've written an entire article about Lightroom on Mobile including how to use Lightroom as your camera app.)
And That's a Wrap!
Phew! Over 2000 words later and I’ve barely scratched the surface of the best Lightroom features. If you know some great features I missed, be sure to let me know
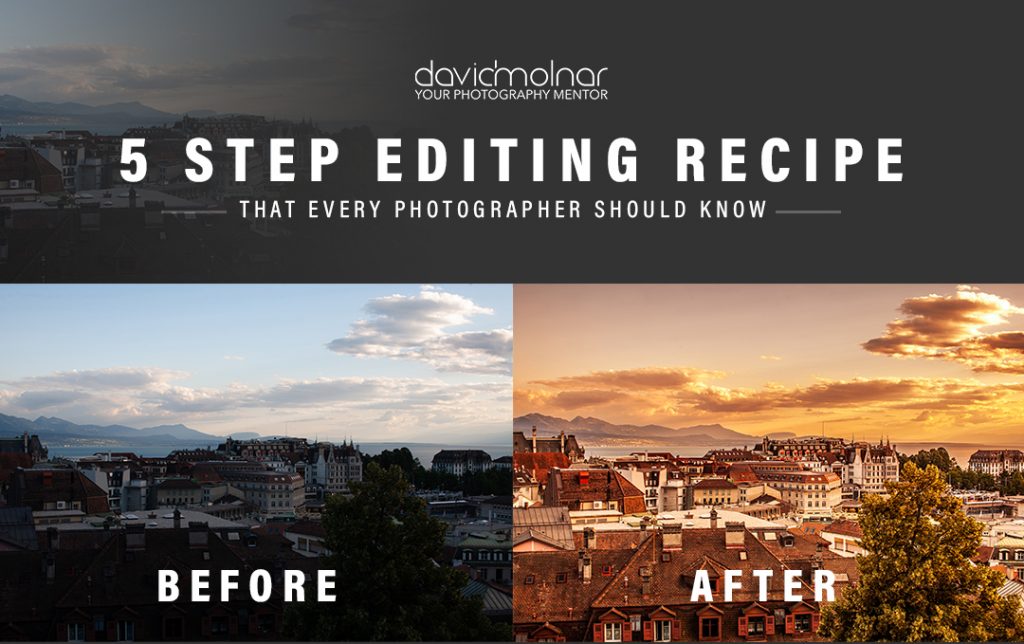
Since we've talked so much about editing with Lightroom today, I'd like to invite you to a free editing training session!
To register, simply click on the image below:


4 thoughts on “Lightroom Best Features”
I’m a new photographer, just started a few months ago. I find it a bit deflating when I see an awesome photo that a photographer has taken, and I am in awe but then I realize it’s been edited with presets. I like my pictures to be exactly what I see through my lens. What are your thoughts on that?
Hi Sandy! Everyone is different and has their own thoughts on this subject. At times, it can be very difficult for your camera to “see” and capture a scene as you see it in person. I think editing can be a wonderful tool to make the photo look the way you remembered it in person. Presets are simply a faster way to edit. Some people prefer not to edit their photos and that’s totally okay too! 🙂
Hi David,
I’ve been a Lightroom user since the version 4 and I’ve never had the smallest problem with it. In 2019, I have decided to join the pack Adobe Creative Cloud and learn how to work with Photoshop.
Unfortunately, I’ve started experiencing some speed problems with Lightroom Classic. I must point out that I use a Macbook Pro with a 2,5ghz Intel Core I7 and 16GB RAM, meaning that normally this features should be more than enough to work with LR without any kind of issues. Regarding Photoshop or any other Adobe software, everything works perfect.
My hard disk presents 30% free space, but when I use LR Classic in the Develop mode, the computer’s fan starts working heavily and LR running very slow.
I changed all the preferences of LR according with the information that I got from dozens of tutorials in the internet, but the problem persists.
Are you familiar with this problem? Can you give me some of advice in order to solve it?
I thank you in advance.
Jorge
Thanks Dave. Interesting post as usual. One doubt I came with rhese days: i have a nikon d750 and need to know which loghteoom version is recommended for raw photos