Hey! I'm Melissa Love from The Design Space and I'm thrilled to be guest blogging for my good friend, David Molnar. We're working on some fun website projects together, so we thought it would be a good time to share some easy but professional design techniques with you that you can use for your next creative project.
Are you getting ready to design a logo or create a brand for your photography business? It’s tempting to just open your design program of choice and start playing around with fonts, isn't it? But, no great graphic designer sits in front of a blank screen waiting for inspiration to strike, yet that’s exactly where many small businesses start when it comes to designing a logo or website. Instead, head over to Pinterest, start a new board and get pinning. Pinterest is a truly awesome tool for keeping your creative projects on track and I’m a big fan. But with great power comes great responsibility. Basically, you have to have a plan.
Side note: the following workflow isn’t just for design projects. You can use these general ideas, even if you are planning your dream bathroom.
REMEMBER. DON’T PIN WITHOUT A PLAN.
Firstly, why not?
Pinterest can be a time-sucking black hole of zero productivity. One minute your pinning pretty pictures of your dream bathroom and the next you emerge blinking, three hours later, from a Pinterest binge, having pinned 300 images of life hacks and kittens. (Maybe that’s just me).
Secondly, what is this plan?
I can’t claim every graphic or web designer works this way, but it works for me consistently, day-in and day-out for every project I do.
You’re going to be pinning with 4 categories in mind. Some people like to make different boards for each category, but feel free to use just one. To begin, tackle just one category at a time, pinning anything that catches your eye, inpsires you or you think might work. Then move onto the next category. I like to tackle things in the following order:
- GENERAL STYLE
- COLOUR
- SHAPE / PATTERN
- TYPOGRAPHY
Start by pinning a selection of the images you are going to use. In my case, as I work mostly with photographers, it tends to be the client’s own work. But every project will feature imagery, so get it up there. (This can also be useful if a client has supplied you with *ahem* less than stellar photography. Seeing their images on your cool Pinterest board tends to encourage them to invest in better photography).
Once you’ve pinned to your heart’s content and loaded up your images, it’s time to be ruthless. Cull anything that doesn’t make the grade, until you’re left with the essence of the project and then start to identify your key pins.
If it’s a brand project, I usually start by entering key search terms into Pinterest. Let’s use this board, the inspiration for my Campus website design, as an example.

I knew I wanted a slightly retro feel, so I entered keywords like ‘retro menu’, and also (#sorrynotsorry) ‘hipster design’ and I pinned some general style type stuff and right alongside it, I uploaded a few of the images I was planning to use in the design.
Here are a few of my image and style pins coming together nicely.
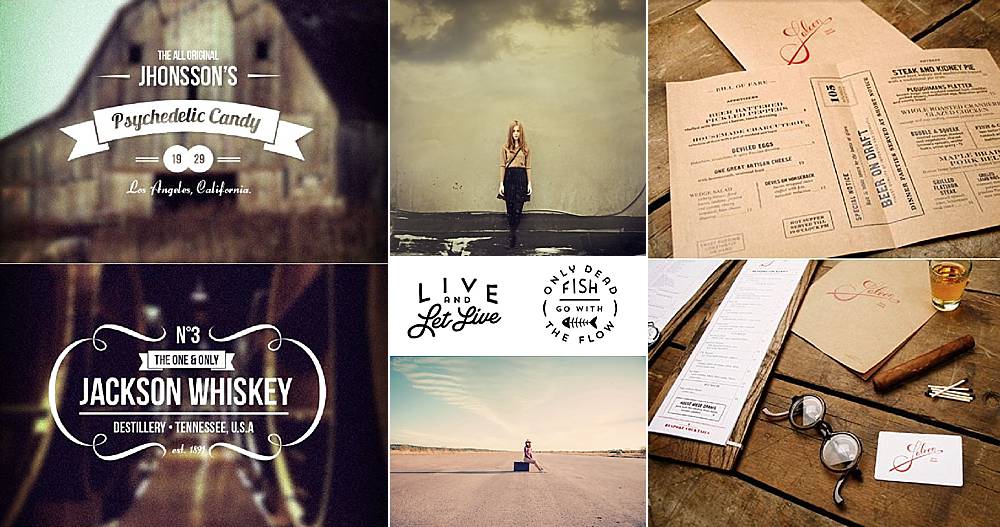
Next I like to get my colours sorted. I knew black would be the anchor colour but I also knew I didn’t want white as the main background colour. Too light and bright for my inner hipster. Sometimes all it takes is to group a project image and a couple of pins together to get your palette sorted. My key project sat so well with the beige background and orange highlights from these pins, that I knew had the combination I wanted.
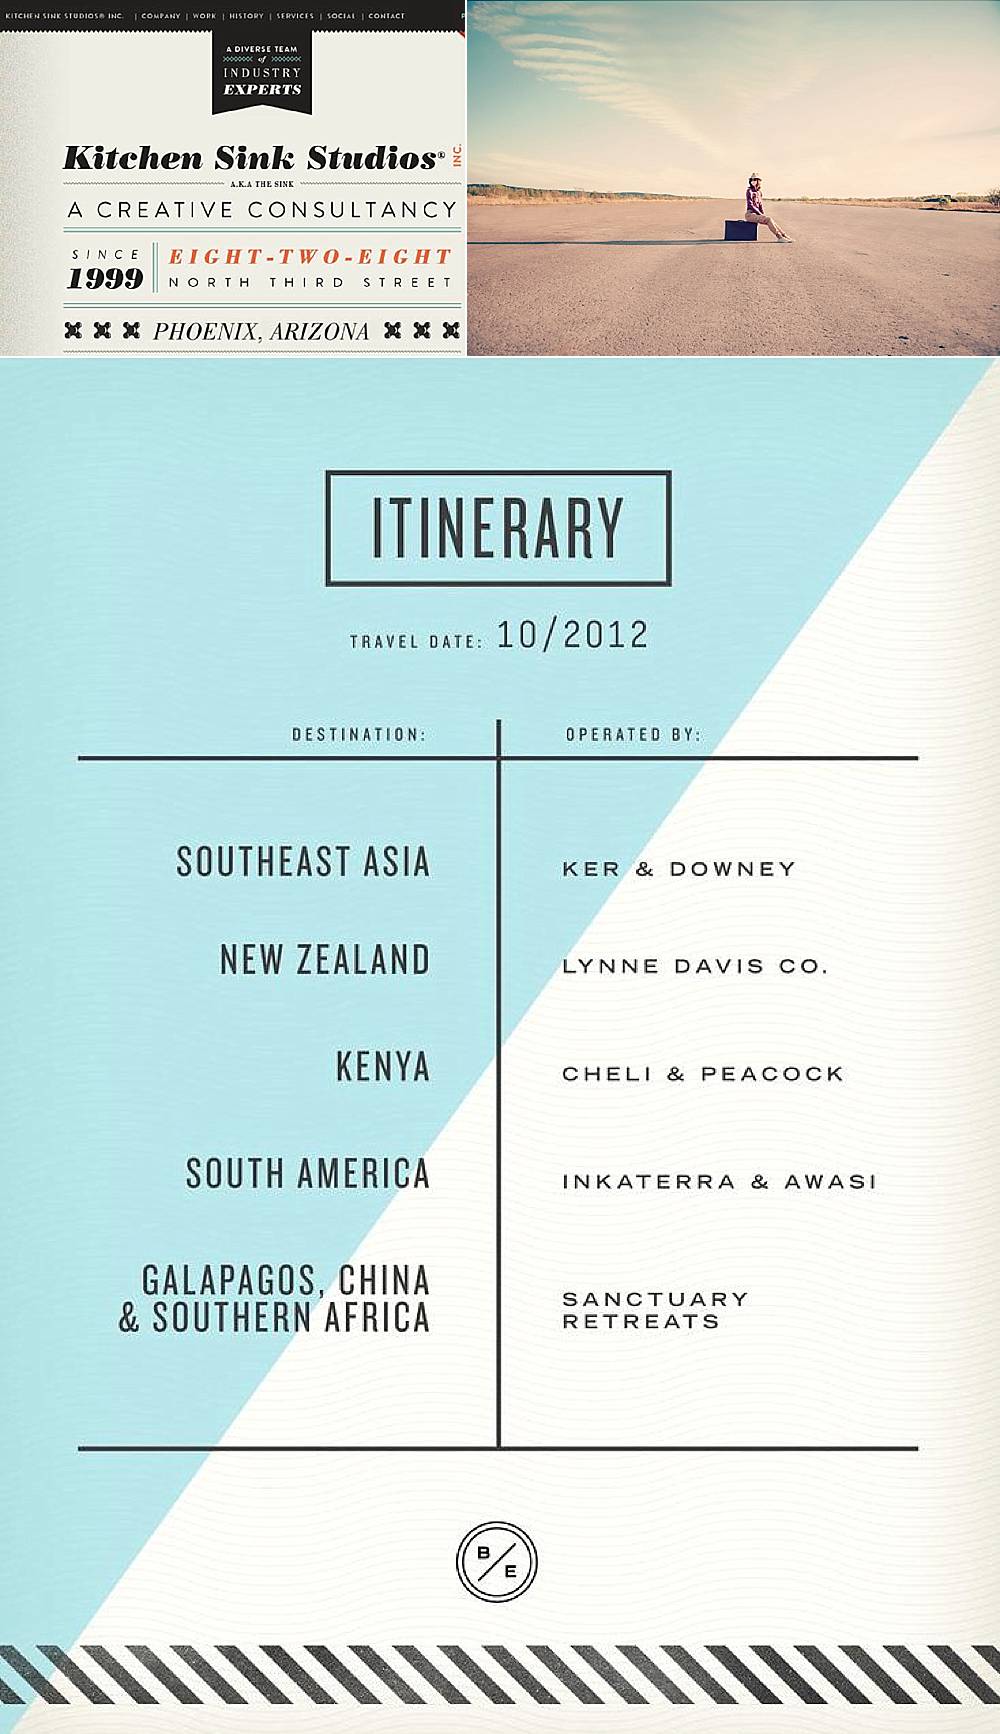
The next category – Shape / Pattern – can be a bit tricky to get your head around. In this case, I knew I wanted a boxy feel, so I looked for ‘grid web layouts’ and also took inspiration from some previous retro menu pins.
Finally, and always my favourite part, Typography. I have way more fonts than pairs of shoes – it’s a nasty addiction. The key to getting font selection right, isn’t to start out with a specific font in mind. That closes your creative options down before you even get started. Instead, pin combinations of fonts that catch your eye and which match the general style of the project, then analyse why they work.
Here are my key typography pins. Not only did this help me decide on the diner-menu-style navigation I wanted, I could see that a brushy font would sit nicely alongside a mix of retro-feeling fonts.
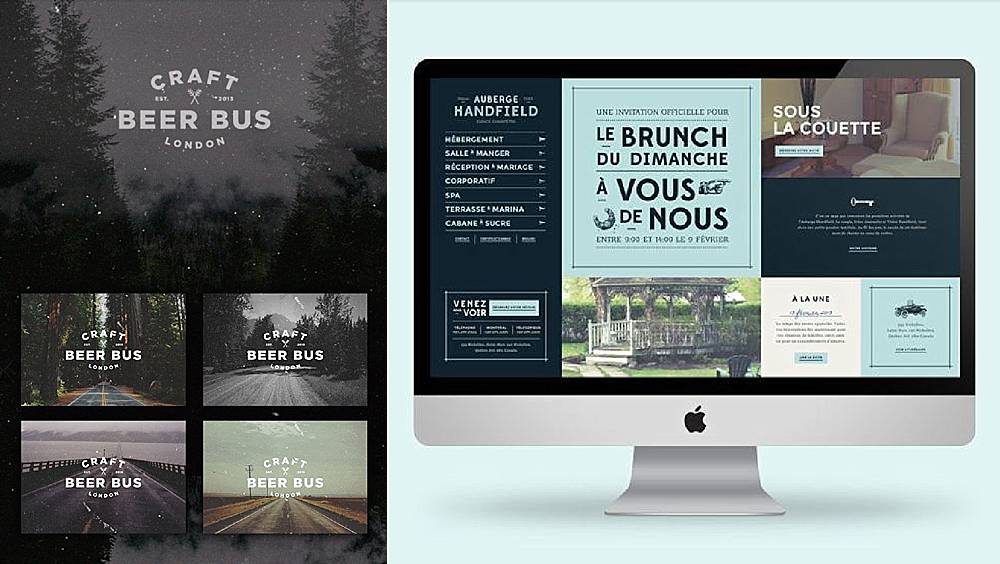
If my brand project is also going to extend to designing a website too, I finish with a final pinning spree using search terms like ‘web design’, ‘web layouts’, ‘print layouts’ and I often use these pins to get a gut response from the client. I allow them to do the cull and together we zero in on the web elements we like the look and feel of. Very important note: at this stage, we really analyse why we like a particular web element. Is it the colour? Is it the way it behaves in the browser? Is it the typography? What we don’t want to do, is copy a design element from another website because copying sucks. What we do want to do, is understand why we like something and use that knowledge to develop something unique.
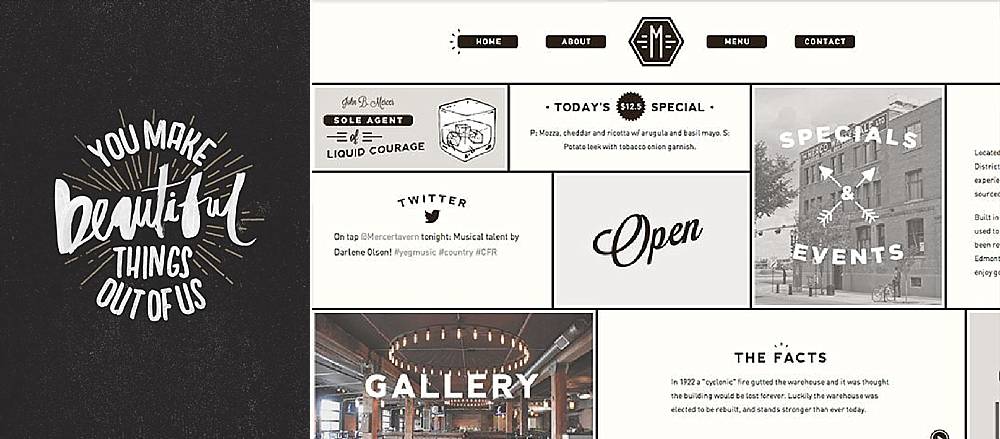
So, how did my project turn out? Here is Campus, a WordPress design for Divi. I hope you can see the evolution from Pinterest board to finished product. Using Pinterest to take baby design steps and build up layers of ideas, is one of the best ways I know to help keep a creative project on track. At every stage of a project, I make sure to refer both myself and my client back to the boards frequently, to make sure we’re still on the same page.
Good luck with your next creative project. If you have any questions about using Pinterest, make sure you leave a comment. I'd love to help.
PS. What do you do when you’ve finished your awesome project? Make a beautiful pinworthy image of course! Go on, pin it…
P.P.S. A shout out to