Capture Your Best Fall Foliage Photos Ever with These Tips

Capture Your Best Fall Foliage Photos Ever with These Tips

If you’re a landscape photographer, you feel excitement when hot summer nights turn to the crisp, cool Fall days. That’s because you know that glorious Fall foliage is just around the corner. Yes, it's time to capture amazing Fall foliage photos again!

To help you capture those amazing photos of Fall foliage in all its glory, I’ve come up with 12 Fall foliage photography tips.

But we get started, check out this interactive map from SmokyMountains.com that predicts peak foliage season in local areas. (For your best viewing experience on mobile, view in Landscape mode.) 

 Now that you know when to have your camera ready to capture that amazing Fall foliage, let's get started with the tips! 

Tip 1 - A Change (in Depth-of-Field) Will Do You Good

Most landscapes feature a deep depth-of-field, with everything in the scene in sharp focus from foreground to background. 

But don’t let that fact keep you from experimenting with a shallow depth-of-field in your Fall foliage photographs.  

Use a fast lens like a f1.8 50mm to create a shallow depth-of-field. But if you don’t own a fast lens, don’t despair. You can still create a shallow depth-of-field by moving further away from your subject. (The further away you are from your subject, the more the background of your photograph blurs.) 

Try capturing individual leaves or trees with a shallow depth-of-field for dramatic effect. 

If you’re a portrait photographer, take your subject outside to incorporate some flattering warm-toned bokeh in your portrait. 

And don’t forget to take your macro lens along on your shoot. The changing seasons are a perfect match for macro photography (more details to come!)

Tip 2: Add Some Dramatic Backlighting for a Photo with Punch

If you’re not familiar with what backlighting is, backlighting places the light source behind the subject. It creates a gorgeous effect where the edges or behind your subject glow with light – and it adds drama and depth to your photos.

Using backlighting in your foliage shots can elevate the quality of your photos to the next level.

But if you’re not careful when you use backlighting, it’s easy to overexpose your subject or add unwanted shadows. 

Shoot in Manual mode and use spot metering to avoid blowing out your highlights when backlighting foliage. If your autofocus is having trouble locking in (and it probably will!) switch over to manual focus. Another trick is to block the sun with your hand until you’ve achieved focus. 

To help control bright sunlight, add a neutral density filter to your lens. A lens hood helps avoid unwanted lens flare. You can also shoot through the trees using a small diameter f-stop (f-16 or f-22) to produce a sunburst in your photo. 

Tip 3: Change Your Perspective

It’s time to get creative! 

You don’t want the same generic foliage shots as every other photographer, do you? 

Then change up your perspective! 

Shoot from low to the ground for a field mouse’s-eye-view of the changing seasons.

While you’re down there, you may notice other elements that would be perfect subjects for macro shots – mushrooms, moss, unique rocks – maybe even an ant hill! 

Just don’t stand on that ant hill. I made that mistake once while trying to get a shot, and I wouldn’t recommend it to anyone.  

For example; Shoot from Above

It's not always possible to get above the treetops, but when you can, it's always worth it! And you don't need a plane or a drone to get this shot, either. 

Hike up to a higher vantage point (or take the lazier route of driving) to capture leaves changing from cool green to warm golden tones. This is often a great way to incorporate some leading lines into your photo at the same time. 

Tip 4: Don’t Plant Your Feet – Move!

It’s a mistake to set up your tripod before you check out your scene from different angles. Walk around the site, and approach your subject from different angles. 

A slight change of angle can be all it takes to eliminate any distracting elements from your scene. Sure you can remove distractions in post-processing, but it’s a heckuva lot easier to avoid them in the first place when you can!

Don’t forget to look up. A blue sky peeking through branches filled with golden leaves creates a beautiful contrast of tones. 

Tip 5: Take Care with Your Composition

Student Photo Courtesy of Dawn Latour

Good composition makes all the difference between a mere snapshot and a landscape that makes your jaw drop when you see it!

So follow tested landscape composition techniques like these when you’re out capturing that glorious Fall foliage. 

  • Incorporate leading lines

  • Follow the Rule of Thirds and find Golden Triangles

  • Balance (have one strong center of interest and make secondary subjects point to that central point of interest) 

  • Apply scale (for example, show the vastness of a mountain scape by zooming in on a human subject looking up at it) 

This isn’t a post about landscape composition, so I don’t want to go into too much detail here. 

But if you’d like to learn how to use these elements in your landscape compositions, sign up for my free landscape training here. 

Tip 6: Make Bad Weather Your Best Friend

When you’re out shooting Fall foliage, don’t be a ‘fair-weather friend.’

Learn to embrace a little bad weather because it can enhance your fall landscape photos. 

For example:

  • Leaves look more vibrant when they are wet. Get out and shoot right after a rain for jaw-dropping results

  • Dew drops look amazing against the warm tones of fallen leaves

  • Soft grey skies contrast well with the vibrant oranges, reds and yellows of Fall foliage

  • Frost on leaves is stunning – try some macro photography to show it off to its fullest effect

  • Fall mornings are often misty –  and mist always adds drama and interest to your foliage shots

Peak foliage season is fleeting, so don’t wait for a perfect sunny day to go out and shoot. 

Tip 7: Incorporate a Reflection for Twice the Impact

Student Photo Courtesy of Dawn Latour

Some of the best Fall foliage photos incorporate reflections. After all,  who doesn’t enjoy seeing twice the beautiful Fall colors in the same frame? 

A windless day is a perfect excuse to venture out to a local lake or pond to capture perfect reflections of leaves changing color. But if you don’t live near a body of water, don’t let that stop you. Even a puddle can produce amazing reflections!

Gear tip: To avoid glare off the water, add a polarizing filter to your lens. 

Here are a few more tips to capture picture-perfect reflections of autumn splendor: 

  • Include some foreground interest (a rock, branch, even a bench) in your photo to break up the reflection.
  • Try zooming in to capture reflections of the leaves in the water but don’t include the trees producing it. The water will appear in your photo as pure gold (or red, depending on the predominant color of the leaves.) 
  • Experiment with a longer exposure of ½” to capture small movements in the water without over-smoothing it. 

Tip 8: Slow Your Shutter Speed to Catch Falling Leaves

Using shutter speed creatively enhances your Fall foliage photos. Slowing down your shutter speed allows movement to show in your photographs to add an artistic effect. 

Here are some ideas for using a slow shutter speed to capture motion in your photograph: 

  • Falling leaves and branches blowing in the breeze

  • Capture flowing water, surrounded by red, yellow and orange leaves

  • Pan your camera as your subject moves

Note: When you’re shooting at slower shutter speeds use a tripod to reduce camera shake. (Whenever your camera is on a tripod always turn off image stabilization/vibration reduction for best results.)

Tip 9: The Landscape Photographer's Dirty Little Secret

Sometimes we move rocks, or branches or leaves to improve composition in our shots. 

Since we’re capturing foliage, don’t be afraid to sprinkle a handful of leaves on a rock, the surface of water, or even a bench. Don’t overdo it; or you’ll get fake looking results. 

Kinda like this: 

While the image above is pretty, it's obvious that it's staged. 

I prefer something that looks a little more natural, along the lines of this image: 

If you decide to give nature a helping hand, be respectful. It's one thing to move a branch that's already laying on the ground, and another to break it off a live tree.

Never remove natural materials from the site of your shoot.

Finally, leave the site of your shoot looking better than you found it. Pick up any litter that you find at the location so others can enjoy the locale too.

Tip 10: Golden hour Intensifies the Warm Tones of Fall

Student Photo Courtesy of Natasha Irene

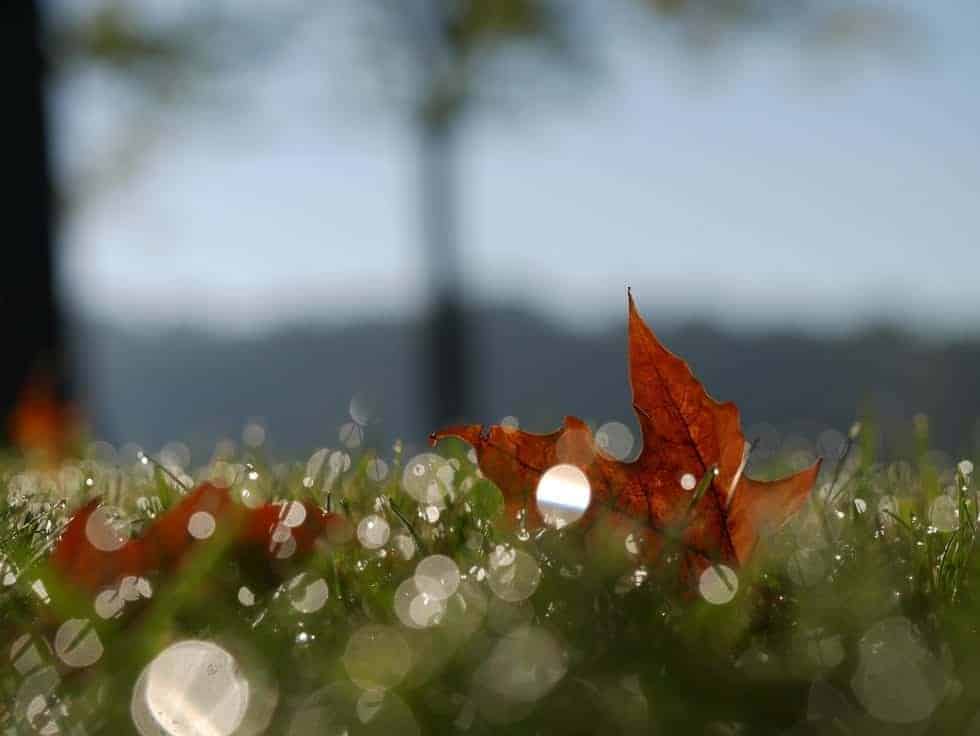
That soft, golden light that appears in the hour before sunset and after sunrise is a landscape photographer’s dream, no matter what their subject is! Fall foliage is even more beautiful bathed in this perfect golden light. 

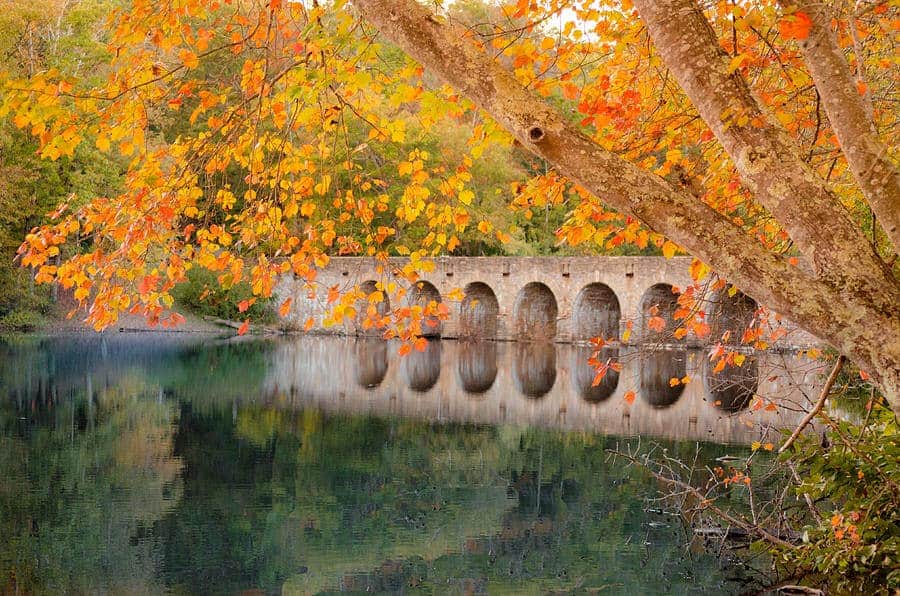
But don’t forget about Blue Hour – those fleeting moments after the sun goes down in the evening, or before it rises in the morning. The cooler air of that time of day adds a blue tone to the light. 

And since blue is a perfect contrast to orange tones, shooting during that time of day makes Fall foliage pop. 

Remember, if you shoot during the blue hour, you’ll be shooting in low-light conditions.  Therefore, you’ll want to select a lens with a maximum aperture of at least f2.8 to let in enough light for a correct exposure. 

You may also need to leave your shutter open longer for a correct exposure and/or bump up your ISO to get a good exposure during this time of day. 

Tip 11: Underexpose Your Fall Foliage Photos

You’ll want to capture as much detail as possible in your foliage photos, so underexpose them slightly.

It's better to increase exposure a little in post-processing than it is to overexpose and blow out your highlights. That's lost detail and color you won't recover in post no matter what you try. 

Tip: Shooting in Aperture priority mode? Then use the Exposure Compensation button and dial in -0.5 EV or -1.0 EV. This way you’ll get that slight underexposure without changing any of your other camera settings. 

Tip 12: Go for Fall Foliage Photo Minimalism

The saying “Go big or go home” doesn’t always apply to photography. Sure, we want the classic wide-angle photo of a forest decked out in a riot of Fall color, but that’s not where we should stop with our autumn photography. 

Minimalism often tells a story with more impact.  

For example, isolate a single perfect tree in all its Fall glory.  Or a single leaf resting in a puddle. 

Incorporating negative space around your subject heightens drama and helps you convey the mood you felt when you pressed the shutter. It can amplify the emotions of solitude, loneliness or peacefulness conveyed in your photos. 

And that’s a wrap! I hope you enjoyed this post as much as I did writing it. 


Would You Like More Landscape Photography Tips Like These? 

I’ve created a FREE landscape training for you. During the training, I'll share the “3 Biggest Mistakes” I see landscape photographers make.

To register, click on the image below to reserve your spot. 

Leave a Comment

Your email address will not be published. Required fields are marked *

Referral Link Copied!

Send it to your friends via text, email, or social media to invite them to TPM!

×
Select Your Camera
Please choose a camera for a personalized version of Master Your Camera.
Send this to a friend