Help! Why is My Lens Vignetting?

this product
Photo by Angie Rivers

Recently one of my students, Angie Rivers, asked this question inside my photography learning community, The Photo Mentorship:

“I need a bit of help. My AF-S Nikkor 35mm 1:1.8G DX fixed lens is creating vignetting. It didn’t use to do this. This photo was shot with my Nikon D750 (which is a recommended camera body for this lens) at ISO 100, f/2.8, 1/2000 sec. Has anyone else experienced this? What did you find was the solution?”

The answer was that the vignetting occurred because of using a lens designed for a crop-sensor camera on her full frame camera.

Now that’s a short and simple answer. But let’s look into the vignetting issue in more detail.

First of All, What is Lens Vignetting?

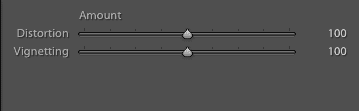
When you see lens vignetting, it means that the corners of your image are darker than the center. (You can really notice it in Angie's image above.)  

Since the lens Angie used was a wide-angle, fast prime, it made the problem even worse. The wider the aperture, the more that light rays at extreme angles are blocked off by the barrel of your lens. 

As you stop down your aperture, lens vignetting disappears to the point that it's barely noticeable, because the angle the light enters your lens is reduced as the aperture gets smaller.

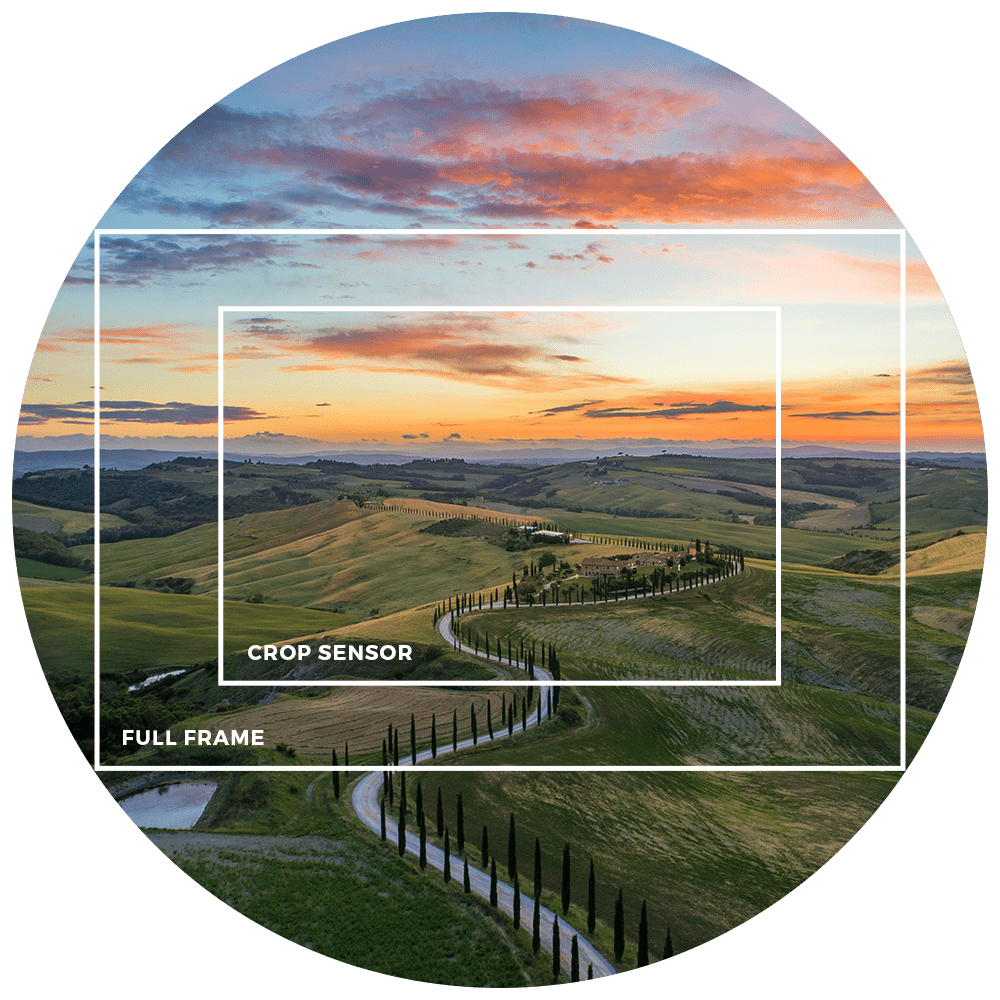
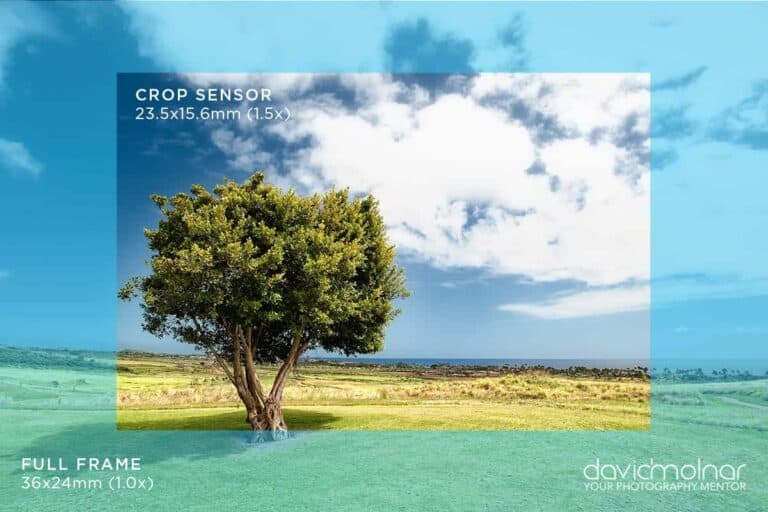
But the biggest problem here was that Angie used a lens designed for a crop sensor camera on her full frame Nikon D750.

Why Do Lenses Designed for Crop Sensor Cameras Cause Vignetting on a Full Frame Camera?

Both Sony and Nikon allow you to use crop sensor and full frame lenses interchangeably.

But even though Nikon says Angie’s AF-S Nikkor 35mm 1:1.8G DX is a recommended lens for this camera, it’s a bit of a half-truth. (I’ll explain this soon.)

First know that every lens produces vignetting in the extreme corners of the image. And in general, zoom lenses produce more vignetting than prime lenses because of their more extreme focal lengths.

But the actual reason this crop lens produced so much vignetting is because the image circle produced by the barrel of this lens is much smaller than the size of the sensor of her D750.

Explanation of the Image Circle

All lenses are cylindrical, and the glass at the end of the lens is round too. Thus the image produced by your lens is actually round and is referred to as the “image circle.”

Now if you’re saying, “Wait a minute, David! My images aren’t circular, they’re rectangular.”

That’s right! But your camera only captures the region of the image circle that’s the same size as its sensor. Since your camera’s sensor is rectangular, that’s why your image is too.

Here is an illustration that shows the relationship between the size of the image circle and the size of your camera's sensor. 

 The larger full frame sensors catches the extreme edges of the image circle produced by the smaller crop lens. And lens vignetting is always worst at the extreme edges of any image. 

And that’s exactly why Angie had the vignetting problem with her lens.

Is This True for Canon Lenses As Well?

You don't need to worry about your crop lens producing vignetting with your full frame camera for one simple reason.

Canon crop lenses aren't compatible with their full frame cameras.

The mounting flanges on Canon's full-frame and crop-sensor cameras are different. The flange on a crop sensor lens is longer than its full frame counterpart because APS-C cameras have smaller mirrors that take up less space inside the camera. 

If you try to use your Canon crop lens on your full frame, its mounting flange could easily hit the mirror and damage it. So don't try this at home. 😉 

Using a Full Frame Lens on a Crop Sensor Camera

If you want to use a lens meant for a full frame camera on your Nikon or Sony crop sensor camera, you won’t have any issues. Surprised? 

The reason is that the image circle produced by a full-frame lens is more than large enough to fill the area taken up by your camera's crop sensor. 

This means you won’t see the excess vignetting like you would if you used a crop lens on the full frame. 

Ok, Let’s Get Back to that 35mm f1.8 DX Lens Being 'Compatible' with the D750 Full-Frame

Some Nikon full-frame cameras have a special DX mode that crops images in camera to the same size produced by a regular crop sensor. (Just like Angie’s D750 does.) That’s why Nikon says that 35mm DX lens is compatible with this camera.

Now, if you’re wondering why anyone would want to put a full frame camera into crop sensor mode, remember that the smaller crop sensor produces a magnification factor of 1.5 times (or 1.6x, with Canon.) That gives you a lot more reach without resorting to long, heavy telephoto lenses. That’s the same reason wildlife and sports photographers favor crop sensor cameras.

But if you go this route, there is another trade off to think about too.

You'll also lose the image resolution you'd normally get with your full frame sensor.

Here's why.

Image Resolution

Image resolution refers to the amount of information captured by your camera's sensor. So it just makes sense that a bigger sensor captures more information, right?

When you enter crop mode on your full frame, you're effectively reducing the size of your sensor.

A full frame camera has a sensor that is 36 x 24mm, while a Nikon or Sony APS-C camera has a sensor that is 23.6 x 15.7mm. Here is an illustration that shows the size difference between a full-frame and a crop sensor:

So it's easy to see why you're losing a lot of information if you use crop mode.

If you're just uploading your image to social media you won't notice a huge difference. Where you will notice a big difference is when you print out your photos bigger than 8″x10″. As you print in bigger sizes, you'll notice your images look increasingly grainy.

Accidentally Shoot with a Crop Lens Like Angie Did? Here's a Lightroom Fix

Angie was able to fix her vignetting problem with the help of the Lens Correction tab in Lightroom. In the Develop module, scroll down to the Lens Correction tab, and check “Enable Profile Corrections.” 

Lightroom should automatically detect the lens you're using. In rare instances, if there isn't an available lens profile, you'll see “none” in the three drop down menus.  

Checking this box will do a lot on its own but there are two sliders, that can help to minimize vignetting even more, the distortion and the vignette slider

Here's Angie's Image After Lens Correction in Lightroom

While you can still see some slight vignetting (especially in the extreme corners of Angie's image) applying lens correction in Lightroom vastly improved this image.

Before Lens Correction Adjustment: 

Photo Credit: Angie Rivers

After Lens Correction Adjustment

Photo Credit: Angie Rivers

The entire image is cleaner and brighter. 

So remember this trick if you ever get unwanted vignetting!

Ready for More Editing Help?

Join me for a FREE editing training session where I teach how to edit your images in 5 easy steps. To register for the training, click on the image below. 

Also explore...

Leave a Comment

Your email address will not be published. Required fields are marked *

Referral Link Copied!

Send it to your friends via text, email, or social media to invite them to TPM!

×
Select Your Camera
Please choose a camera for a personalized version of Master Your Camera.
Send this to a friend