How to Add Metadata to Your Photos

You’ve probably heard about photos being stolen and used online without the photographers’ consent and permission. To combat this, many photographers watermark their images with a logo or signature. Unfortunately, watermarks can easily be cropped out. 

You can add an extra layer of protection to your images (and intellectual property) by adding metadata. Metadata imbeds copyright information directly onto your images and can’t be easily removed as easily as a watermark can be cropped out. 

You can also add keyword metadata to your photos to make it easy for you to locate specific photos in your image catalog. Way better than combing through a huge image catalog to find what you want!

But before we get into the details about how to add metadata to your images, let’s define what metadata actually is. 

What Exactly is Image Metadata?

According to the International Press Telecommunications Council (IPTC), the international governing body that has set the standards for image metadata, metadata is this:

“A set of data describing and providing information about rights and administration of an image.” 

Metadata allows information about the image to be stored with it in a way that’s understandable by both computers and human users. 

There are two places metadata is stored:

  1. Embedded with the image file itself (PNG, JPG, DNG, etc.)
  2. As part of a digital asset management system, a sidecar file such as an XMP file, or in an external news exchange format document specified by the IPTC.

What Kind of Data is Stored in a Metadata File?

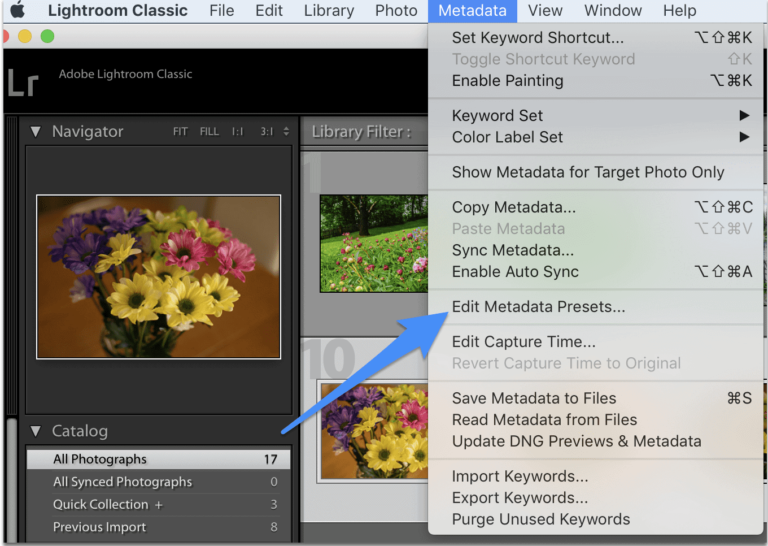
Metadata files store three types of data about an image– Descriptive, Rights, and Administrative. 

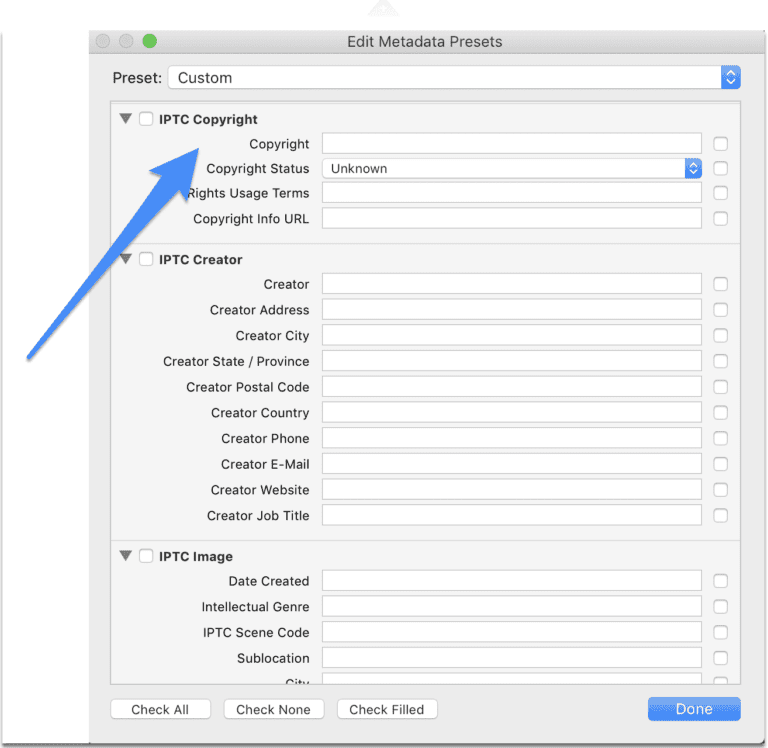
Descriptive data: headlines, captions, keywords, persons in image, location, company creating the image, artwork, and product shown in image. 

Rights data: Identifies the creator of the image, the copyright (if it exists), credits, and underlying rights. The underlying rights may include commercial licensing information, and links to rights reserved under Creative Commons. 

Administrative data: Creation date & location, instructions for users, job identifiers, and other details. 

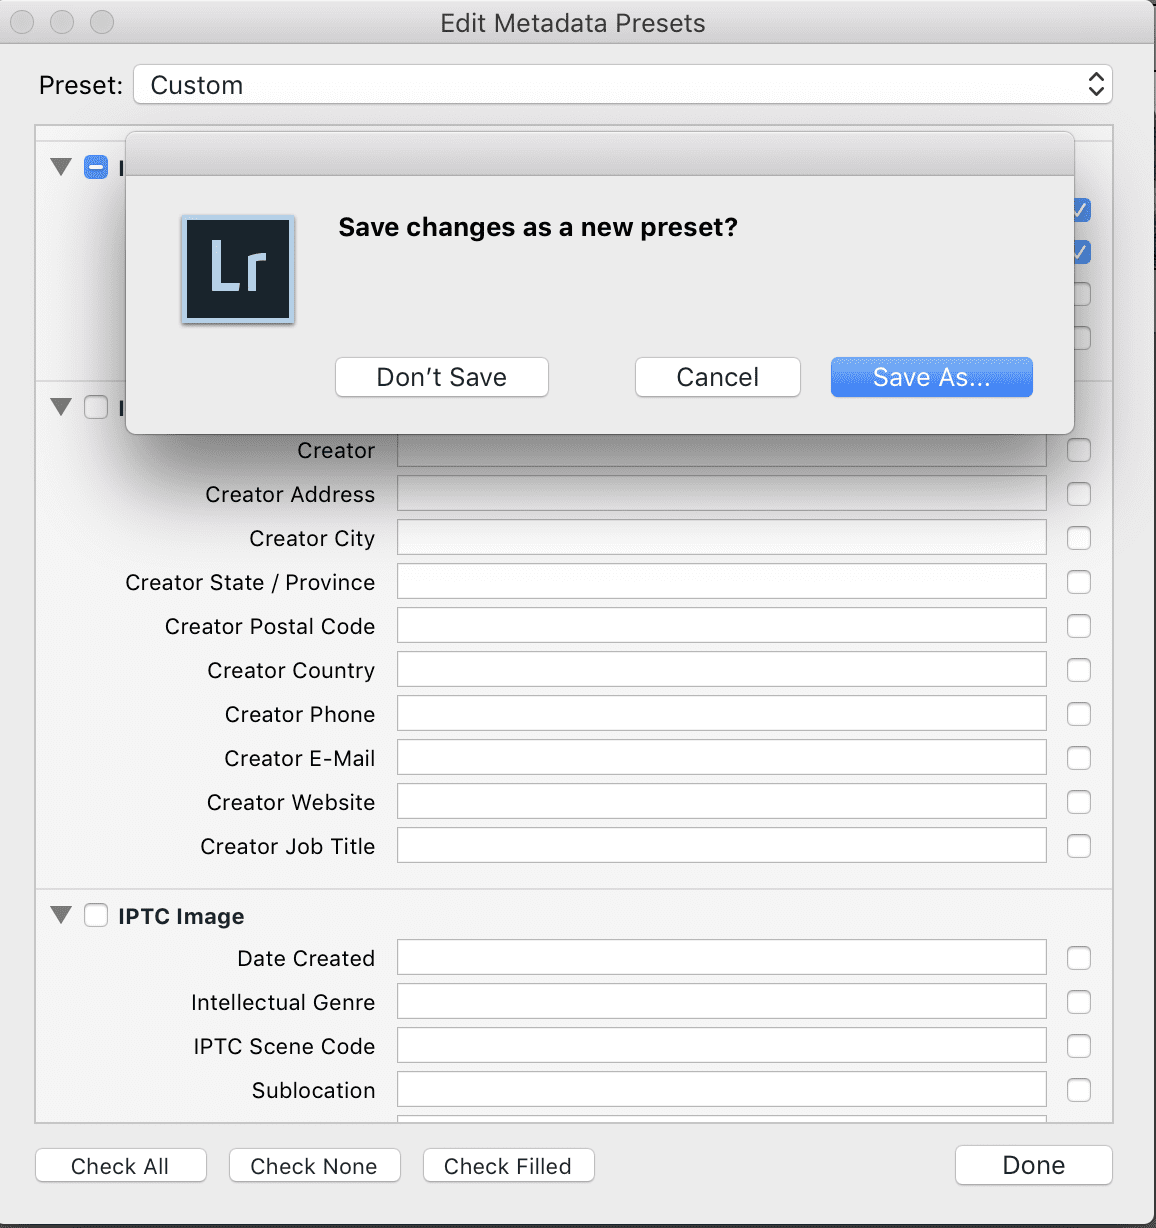
How much (or how little )metadata you include with your image depends on is up to you. 

Not the Same as a Watermark

Just to be clear, adding metadata to your photo is not the same as adding a watermark to your photo. A watermark is a transparent logo or signature added to a photo to identify its creator. Along with helping your brand get recognized on social media, it can also discourage people from using your photos without permission. 

The downside of watermarks is that they can easily be cropped out of most photos. 

Metadata adds an extra layer of security to your photos because it's more difficult (although not impossible!) to remove. It also allows you to be identified and contacted in case someone wants to use your photo or hire you, which isn’t the case with a watermark. 

So let’s look at how to use metadata fields to add a copyright notice to your images. 

Adding a Copyright Notice to Your Images with Metadata

Step 1: Locate “Metadata” in the Menu Bar 

Launch Lightroom in the Library module. On the Menu bar, select Metadata > Edit Metadata Presets

Step 2: Scroll Down the List to "IPTC Copyright"

Next, a metadata list will appear with form fields to fill. 

Scroll until you locate “IPTC Copyright.”

Fill in the fields with your info. You can choose your own name, or your company name for the “Copyright” field. 

Under the “Copyright Status” toggle, you can choose to copyright your image, or release it as a public domain image. 

The “Rights Usage Terms” allow you to release the image under the terms of a Creative Commons or commercial license if you choose. 

Under “Copyright Info URL” link to the URL of a Creative Commons license or the terms of your commercial license. 


Optional: Fill out the Creator, and IPTC Image info

You can just add the copyright info, or go the extra mile and fill out the Creator, and IPTC Image info.

You don’t have to fill out each line if you don’t want to. You can decide to add only specific data to your preset by using the tick boxes to the right of the fields.   

Once you’ve completed filling everything out, Lightroom will ask if you would like to save your metadata info as a preset. Click “save” and create a name for the metadata preset. You can simply call it “Copyright [year]” to keep things simple. 


Automatically Apply Your Metadata Preset to Your Photos on Import

Once you’ve created your Metadata Preset, you can now automatically apply it to all of your photos upon Import. It's easy!

  1. Open the Import dialog.
    • On a PC: Shift+Control+I
    • On a Mac: Shift+Command+I
  2. Select any option at the top center EXCEPT for Add.
  3. Go to the Apply During Import section located in the right-side panel.
  4. From the Metadata Preset menu, select the preset you just created

Once you’ve selected a Metadata Preset, Lightroom stores this as the default for the next time so you can skip the Import dialog step. 

And here's another super useful thing you can do with metadata – use it to add keywords to your photos. 

Add Keywords to Your Photos

You can also use metadata presets to add keyword labels (for example, wedding photos, outdoor shots, product photography, etc.) so that you can easily find specific photos in the future. When you have thousands of photos in your catalog, you’ll really start to appreciate keywords! 

The simplest way to start adding keywords is through Lightroom’s Keyword Panel.

Start off in the Library Module. Find the Keywording Module on the right side of your screen. 


Enter your Keyword Tags in the Keywording box, separated by a comma. 

Next, when you import your photos, hold down the shift key, then select the first photo you want to apply the keyword to, and the last. Select your keyword, and hit the Sync button. Now your photos will have that particular keyword list attached to it. 

If you want to later find photos with those keywords, go to Library > Enable Filters

Then select Text > Select Text in the dropdown > Contains words > Select keyword. 

Lightroom will then bring up all photos that have that keyword applied. That's a heckuva a lot easier than scrolling through an entire catalog to find one photo, wouldn't you agree? 

More Lightroom Tips

To learn more about ninja editing tips in Lightroom, join me for a FREE editing workshop.

Click the image below to reserve your spot. 

4 thoughts on “How to Add Metadata to Your Photos”

Leave a Comment

Your email address will not be published. Required fields are marked *

Referral Link Copied!

Send it to your friends via text, email, or social media to invite them to TPM!

×
Select Your Camera
Please choose a camera for a personalized version of Master Your Camera.
Send this to a friend