Did you know that you can use Mobile Lightroom Presets without an Adobe subscription?
If you're a photographer you’re probably already using Lightroom Presets to enhance your photos with a single click. There’s no faster, easier way to edit and catalog photos.
But not everyone wants to pay a monthly subscription to Adobe.
There is an alternative – mobile Lightroom Presets. But in this case, the hassle involved with using them (not to mention how tedious it is to install them) you may just decide that Adobe subscription is worth every dime.
What You Need to Know About Mobile Lightroom Presets
If you've worked with regular Lightroom Presets, you'll know that when you’re working in Lightroom’s “Develop” module, you can create different effects by adjusting sliders for exposure, contrast, color, tone curve and so on.
When you’re happy with the look you’ve achieved, you can to save the settings as a Preset to use them later on other photos. These presets are saved with the .lrtemplate extension that identifies them as Lightroom Presets.
In contrast to regular Lightroom Presets, mobile Lightroom presets quite different. In fact they are actually DNG (digital negative) files, with their settings copied over to the photos where you'd like to apply the mobile presets.
DNG is a proprietary Adobe file format that can be used with many different models of cameras without requiring manufacturer specific editing software.
This generic quality makes the DNG file format perfect for making mobile presets because you don’t need any special software to use them.
That's why mobile presets work just fine inside the free Lightroom app without a subscription to Adobe or any add-on software.
So let's get started with a tutorial on how to install and use them!

Preparing to Install Mobile Lightroom Presets
To use DNG files as presets, they must first be imported to your mobile device.
Once they’ve been imported into Lightroom, the DNG file settings then must be copied over manually to your photos. They take a little more work than regular Lightroom presets do, but can still give your photos pleasing effects that take them to the next level.
Note: It makes it much easier to download these DNG presets on to a laptop your desktop computer in order for this to work, but there is a way to get around it.
I’m assuming that you already have the free Lightroom app downloaded and installed on your mobile device.
If not, download the iPhone version here, or the Android version here.
To follow are instructions for how to install the mobile Lightroom presets according to your device type.
Installing Mobile Lightroom Presets to iPhone/iPad
Installing Mobile Lightroom Presets on iPhone is straightforward.
Before you start, unzip the folder containing your presets on your Apple desktop.
Next, Airdrop the contents of the folder to your iphone or iPad.
To use Airdrop, open the folder and select the Presets. Right click and select ‘share to Airdrop.'

How to Use Airdrop
To use Airdrop, open the folder and select the Presets.
Right click and select ‘share to Airdrop.
Your mobile device will show up in the window. (You'll see a circle on the top of your screen with your name and device.)
Click on your name to share the file(s) with your mobile device.
Next, once you have the unzipped folder moved to your mobile device, click on the folder, and select the .DNG files inside once it opens.
Likely, your iPhone will recognize the files as image files and add them to your photo roll. You'll have to trust a bit that they are there because they look like an empty square in the photo roll.
Tap the Share button on the bottom left of your screen. Scroll to Lightroom and select it.
You'll then see a notice “The shared photo will be imported on the next app launch.”
You can either choose to open Lightroom then, or else keep adding your DNG files.
Create Mobile Presets in Lightroom with iPhone/iPad
Once you’re inside Lightroom, open the Develop module and find a DNG preset file you just added.
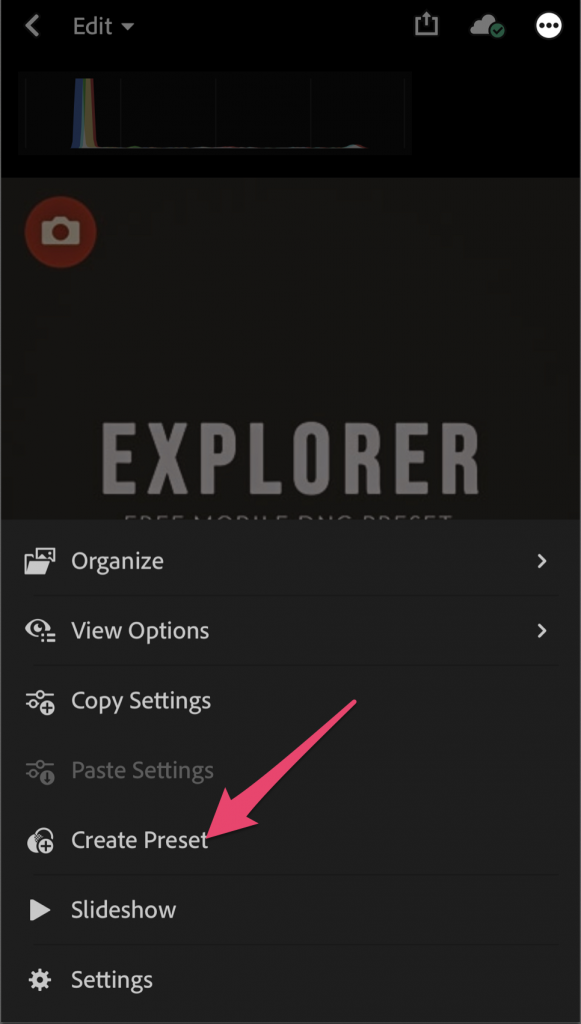
The next step is to click the three dots in the top right hand corner, and then choose “Create Preset” in the bottom left corner.
Then click “user presets”, and create a new preset group.
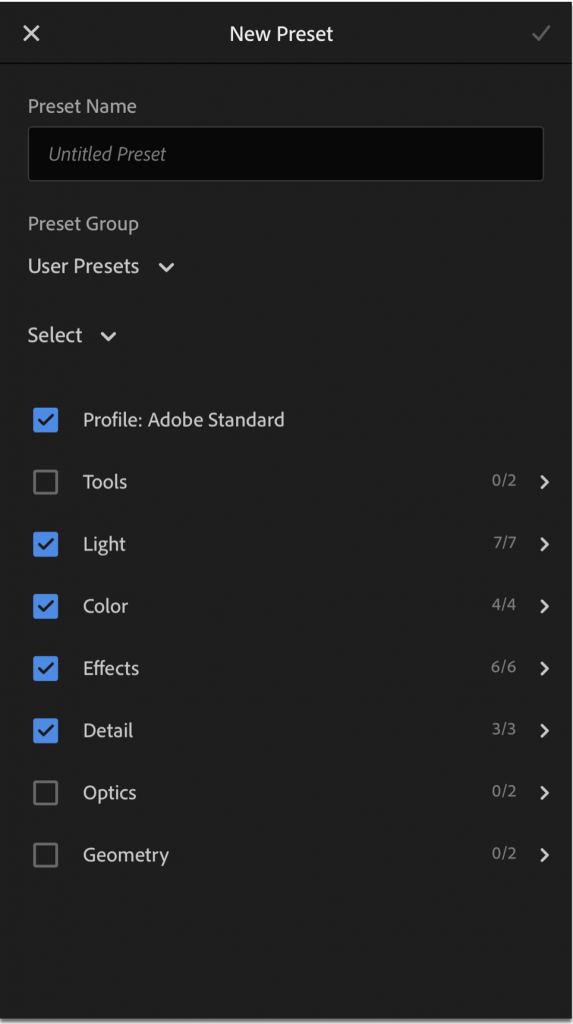
Give the preset group a name, and then also name the preset.
Once that is done, click “Save”, and your preset has been installed.
Apply the preset by choosing an image, and going to the far right hand corner of your editing tools, and choosing the Preset module.
Choose your preset group, and there you will find your newly installed preset that you can apply to your images.
Adding Mobile Lightroom Presets to Android
Android users can use Google Drive to add the mobile presets to your phone.
If you don’t already have Google Drive, it’s a free online tool suite that comes with 15 GB of storage space. Create an account here, then download the free Google Drive app to your mobile device.
Open Google Drive and click on the ‘+' button.
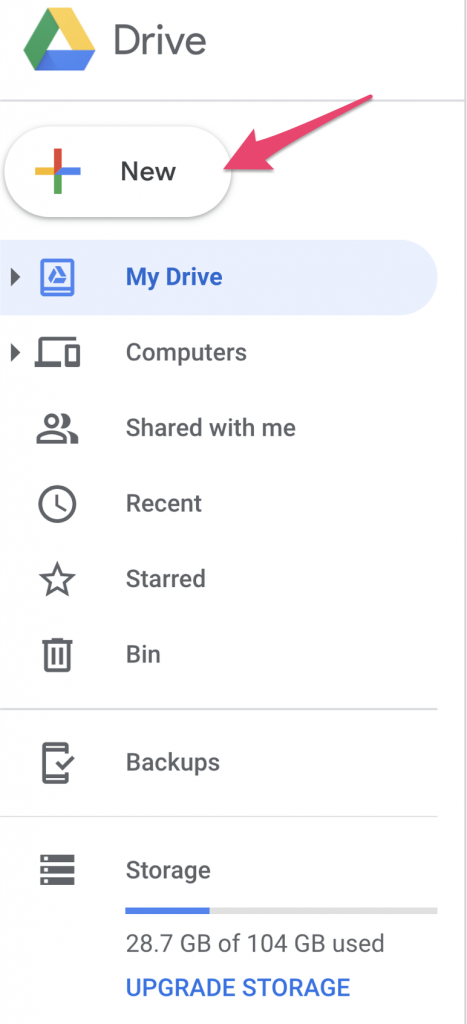
This will open up a new window where you’ll see an option for ‘Folder Upload.’ Click on that option.
Next, navigate to your unzipped presets folder, select it and upload it to Google Drive. Name the folder so you can easily find it on your mobile app.
Open the folder so you can make sure the individual presets have uploaded correctly.
Find and open the Google drive app on your phone. Locate the folder where you uploaded your presets.
Select a preset. Tap the three dots next to the name of your folder. A window will pop up.
Scroll down to ‘Open in.’ Tap and scroll over until you find ‘Copy to Lightroom.’
Exit Lightroom and go back to Google Drive on your phone and repeat the process until you’ve moved all of your presets over to Lightroom.
Organize Your DNG Files to Use as Mobile Presets
Let's organize the DNG so we can use them as presets.
Press the plus button – select “Album” and name your preset folder.
Click the three dots at the top right of your screen to add photos (in this case, it will be your new DNG files.)
Select ‘Choose from Device’ – choose all your saved DNG presets and click add.
Next, to use your DNG preset, select it, then click on the three arrows to the upper right of your screen.
Scroll down and choose ‘Copy Settings.’
Next, find the photo you wish to edit with your new DNG preset.
Select the three dots on the upper right of your photo.
Choose ‘Paste Settings’.
Hold down on your screen to see the before and after.
Enjoy This Post on Mobile Lightroom Presets?
Mobile Lightroom Presets are a good solution for people without access to Adobe’s Photography Plan, but they can’t match all of the editing and organizational power inside the full-fledged version of Lightroom.
Not to mention, if you have an Adobe Photography Plan subscription, you can sync your Lightroom presets directly to your mobile device with a single click. This is far less hassle than going through all the steps you need to import and use mobile presets!
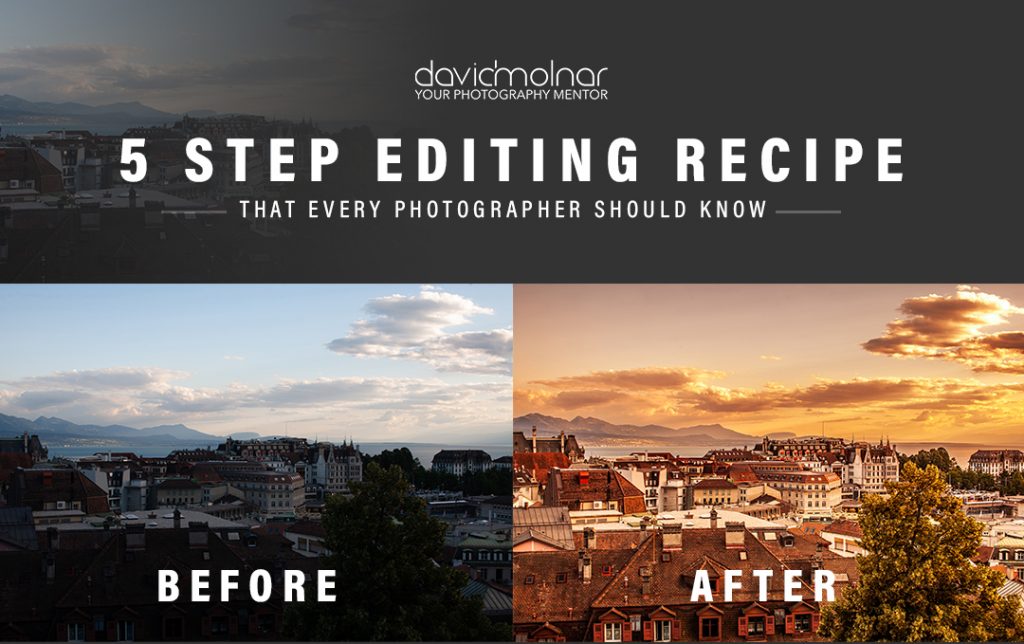
Would you like to see how easy editing with the full version of Lightroom is? Then join me for a free Lightroom training session by clicking the image below.
Register now for my ‘5 Step Editing Recipe’ training. You'll learn how to edit amazing photos with Lightroom's powerful features in just a few clicks!
 impoRegi


