Setting White Balance with Kelvin

Would you like to discover a way to really cut down your editing time, and give your photos a more consistent look? While I love my Lightroom Presets, they aren’t the only trick I have up my sleeve to save editing time. 

One of the biggest editing time savers is learning how to shoot in Kelvin, instead of relying on your camera’s AUTO white balance (AWB) setting. AWB is fine in normal daytime outdoor settings. 

While you can adjust WB in Lightroom if you shoot in RAW mode (more on this to come), it saves time to just get it right in camera. 

But before we do that, let’s talk about the disadvantages of relying on your camera’s AUTO white balance setting. 

The Downfalls of Using Auto White Balance

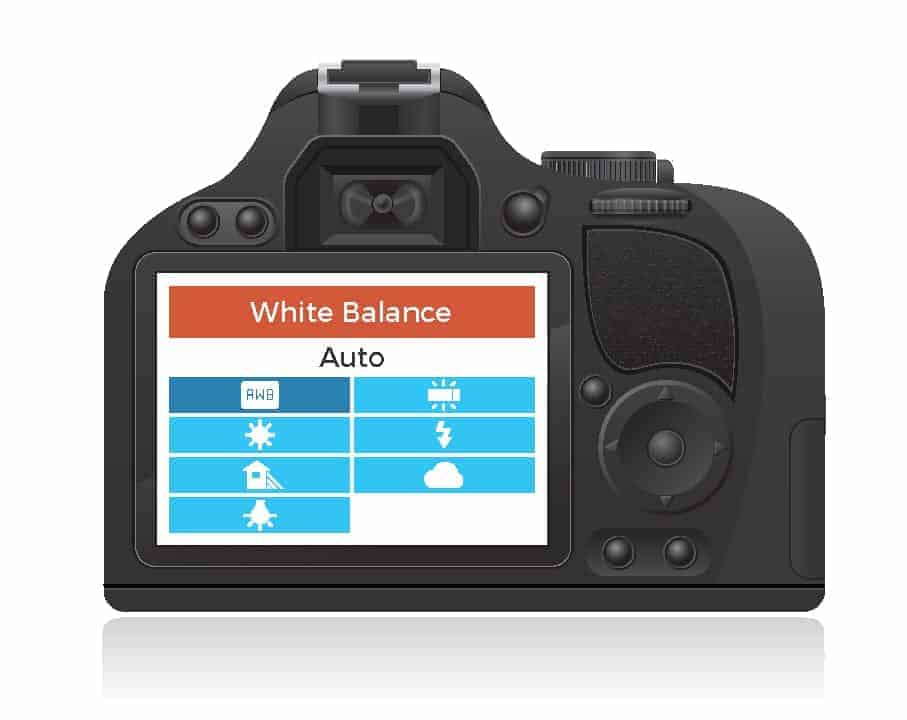
Where AWB really falls down on the job is with very bright (think snowy landscapes) or very dark (think a black car, or black cat) subjects.

That’s because AWB chooses an exposure that averages out the tones in a scene. That’s why snow often looks blue-gray, and black cats look a bit gray or muddy straight out of camera.

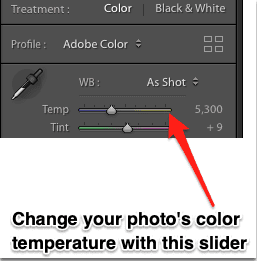
Another time that AWB struggles is if your subject is all one color, like for instance, a pink rose. Your AWB thinks there is too much pink in the scene, so it backs it off, and attempts to neutralize it by making the scene more blue. When you look at your photo in Lightroom, you’ll notice that the tone of the rose is off from how you remembered it.  

Using AWB also neutralizes the beautiful tones orange and red tones of sunrise and sunset, reducing the drama and impact of your photos. 

That’s why learning to set your White Balance with Kelvin is a game changer! You’ll never get those weird tones in your photos again! 

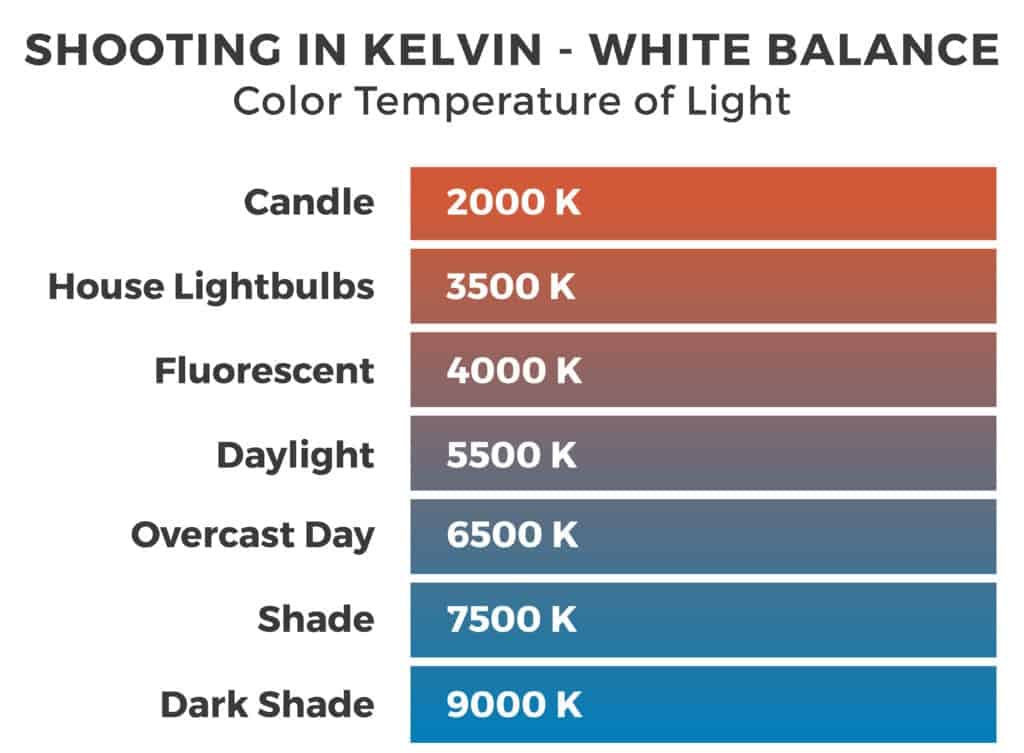
But first, you need to understand what Kelvin is, and how it relates to white balance. 

Kelvin, Burning Carbon, and the Temperature of Light

Back in the 1800s, William Thomson, Lord Kelvin, experimented with burning a block of carbon. He noticed that as the block heated, it first became a dull red, then gradually turned yellow, then blue white at its hottest. (Don’t ask me why he decided to try this…probably because Netflix didn’t exist in the 1800s!)

Kelvin’s experiments created a scale for measuring the temperature of color (among other science-y stuff that we won’t be discussing in this post.)

By memorizing a few common Kelvin color temperatures, you’ll be always able to set your white balance correctly, even in very bright, dark, or monochrome situations. The advantage is that you won’t ever need to spend time correcting your camera’s terrible AWB mistakes in post processing. 

The Kelvin Color Temperature Chart for Photographers

It may seem a little confusing at first to use Kelvin to set your white balance, but it’s really quite simple. You just need to match the color temperature of your surroundings with your camera’s Kelvin white balance settings. 

Note: Not every camera has the capability to use Kelvin to set your white balance. But I do have a decent alternative to AWB in an upcoming section of this post.

The following chart gives you some common color temperatures measured in Kelvin (K.)

So, for instance, if you were shooting outside at noon, you would set your white balance at 5500K. This gives your photos a consistent white balance throughout your session.

Auto white balance can vary from photo to photo because your camera is always trying to evaluate and compensate, which can neutralize colors more than you'd like. Setting your white balance in Kelvin keeps that consistency in tone between photos.  

So Just How the Heck Do I Find this Kelvin Setting in My White Balance Menu? 

Both Canon and Nikon have White Balance buttons (marked as “WB.”) Hit your WB button, and cycle through the icons until you find a setting called “K.” Bingo! This is it!

Then use your main dial to dial in a Kelvin number that corresponds to the lighting conditions you're shooting in, as shown in the chart above.

If you want to play around and see what changing the Kelvin setting does, put your camera into Live View. Notice how increasing and decreasing the number affects how your scene looks? 

The illustration below shows the differences you'd see as you change the Kelvin temperature in your white balance settings. It's fun and easy to get different artistic effects just by playing with this setting. 

As you can see from the illustration above, if you wanted to accent the golden/red tones in your photo, increase the Kelvin setting.

 If you want to cool down overly yellow tones in your photo, decrease your Kelvin settings. 

Try changing your Kelvin settings in increments of 500K. You probably won’t notice much difference increasing or decreasing Kelvin in smaller increments. 

What If My Camera Doesn’t Support Shooting in Kelvin?

If your camera doesn’t allow you to set white balance in Kelvin, it probably has white balance presets for Tungsten, Incandescent, Sunny, Cloudy, and Shade. 

You access these presets the same way that you would access the Kelvin setting, by pressing your WB button on your camera, and cycling through the icons representing these presets. 

Here is an illustration of these icons:

So on a sunny day, choose the sun icon to set your white balance. On a cloudy day, choose the cloudy icon. It's that easy! And you're always free to experiment with the settings for special effects. 

For example, if you wanted more golden tones in your photos, try choosing cloudy or shade, because these settings will increase yellow tones. Or if you want an eerie blue tone to your photos, try incandescent when shooting outside. 

It's all about experimenting and having fun! 

Oops! I Forgot to Reset My White Balance After My Last Session!

No problem! It happens to all of us in the excitement of a shoot. We forget to change a setting, and don’t realize it until later, and sometimes, not until we get home. 

But you don’t need to worry, as long as you:

  • Shot your photos in RAW mode (RAW is much easier and forgiving if you need to make adjustments)
  • Edit with Adobe Lightroom

You’ll be just fine! 

Shooting in RAW preserves maximum detail in your photos and gives you more flexibility to edit and make changes. And editing with Lightroom makes it easy to make adjustments like this one. 

When you open up Lightroom’s Adjustment module, one of the first things you’ll see is this white balance slider located at the top of the Develop module adjustment panel.

White Balance Slider in Lightroom

Moving the slider to the left cools down (reduces yellow and red tones) in your photo.

Moving it to the right warms up, or adds yellow tones, to your photo.

You'll see the changes as they happen so you can tweak them. 

Another option to correct your white balance in Lightroom is to click on the drop-down menu beside “As Shot.” 

Select one of the white balance preset options that will give your photo the look you're after. 

White Balance Preset Options

White Balance Doesn't Affect Tint

One thing to note is that you’ll need to adjust your tint separately from your white balance. 

White balance corrects blue & yellow tones, and tint is for adjusting green & magenta.

The tint slider is the one to adjust, if say, you’ve been shooting outside and your camera has picked up on the greenery to the point it’s overwhelming your entire photo. 

Just move your slider to the right to add some magenta to correct the green tint. Do the opposite if your photo looks too magenta. 

Ready for More Editing Tips & Tricks?

I have tons more editing tips for you! In fact, I have a simple, 5-step editing recipe that makes editing a breeze even for beginners! 

Join me for this FREE editing training by clicking on the image below:

5 thoughts on “Setting White Balance with Kelvin”

  1. Hi David
    thanks for this article.
    So if I set my white balance using Kelvin, colour temperature on my panasonic G9: How will the tint, green and magenta be corrected?
    thanks

    1. David Molnar - Your Photography Mentor

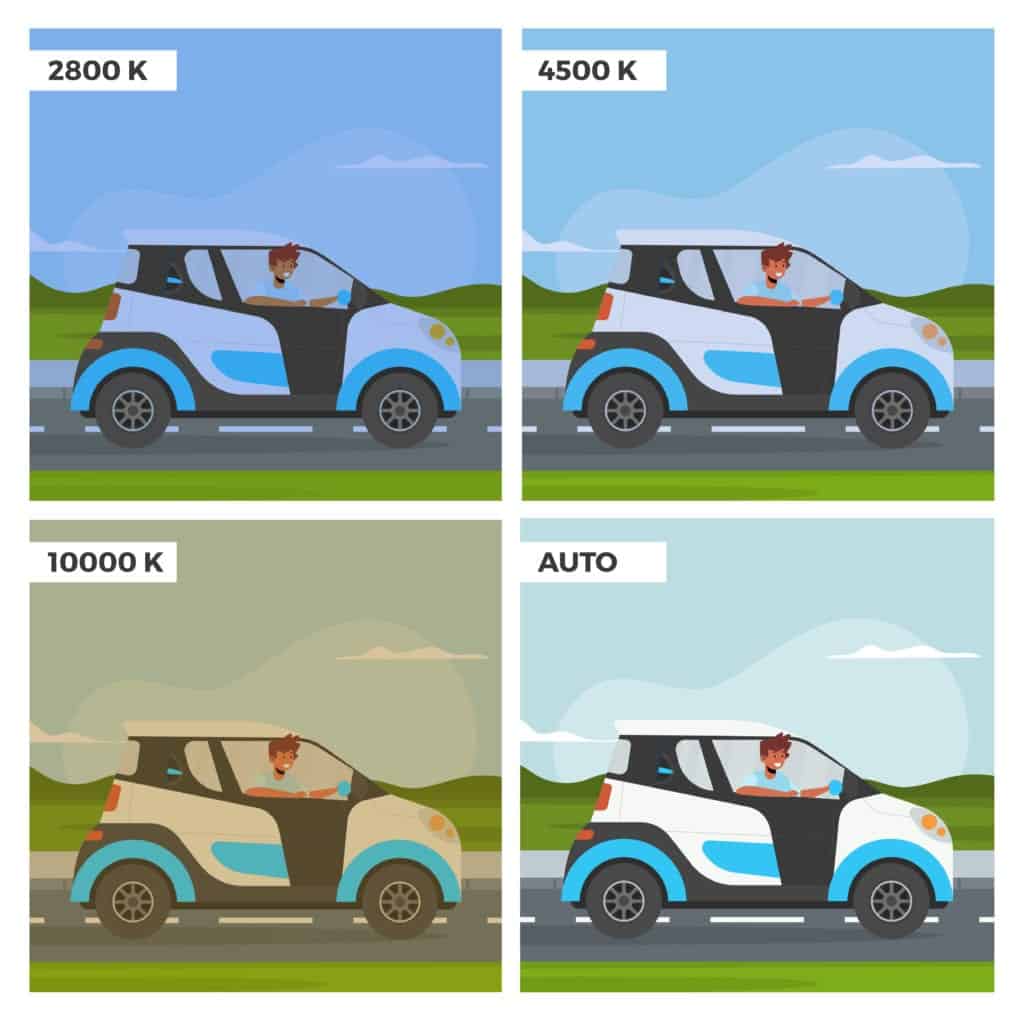
      Hello Harsh, setting a lower color temperature (less Kelvin) results in a blue picture, while setting a higher temperature enhances the amber tones. Setting a negative tint will make the picture greenish, while a positive set tint will create a more magenta-looking image.

      1. Thanks for your reply.
        But the problem is that ‘in camera’ settings do not give option of setting the tint. I can only control kelvin. I am using lightspectum pro to get kelvin and tint values for the ‘scene’. I can put kelvin values into my camera (panasonic G9).
        There is no input for the tint value. I can get ABGM grid in ‘adjust’. This give me the option to G1 to G9 and M1 to M9. To me it is guesswork to convert tint values to GM axis .
        thanks

Leave a Comment

Your email address will not be published. Required fields are marked *

Referral Link Copied!

Send it to your friends via text, email, or social media to invite them to TPM!

×
Select Your Camera
Please choose a camera for a personalized version of Master Your Camera.
Send this to a friend